mercoledì 24 marzo 2010

Portachiavi/ Them keychains

Them, all togheter

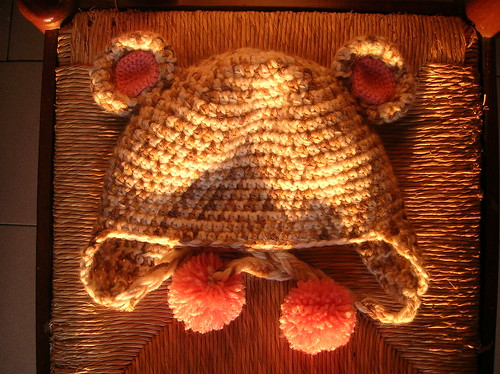
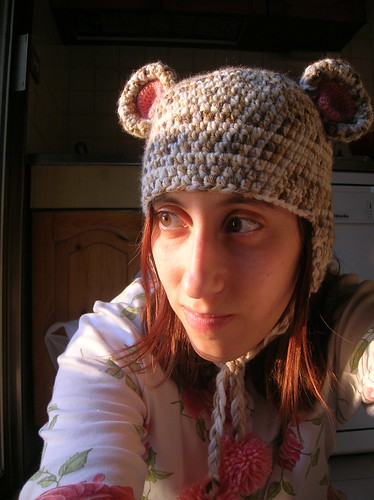
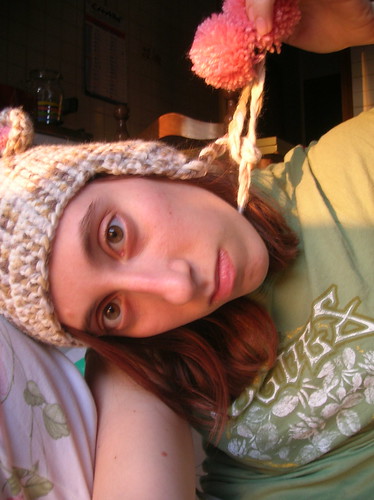
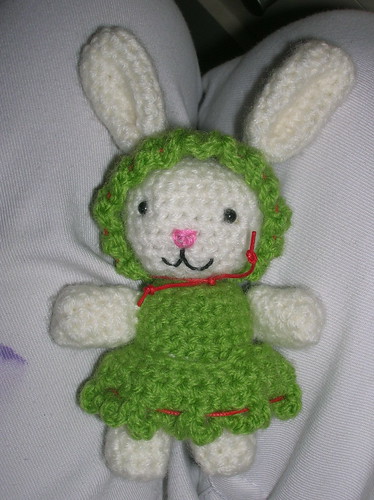
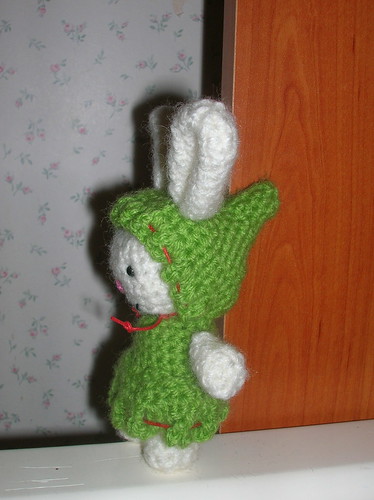
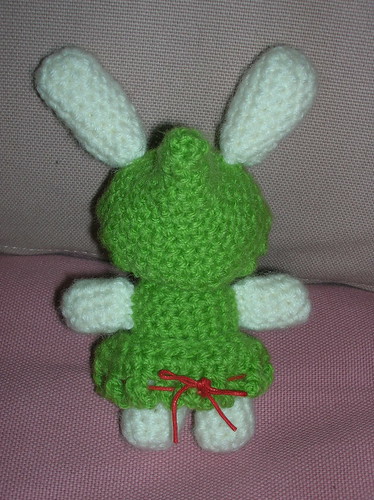
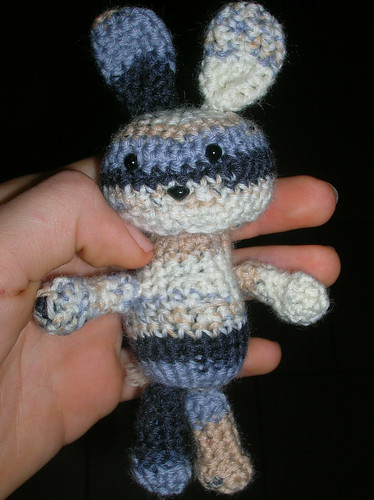
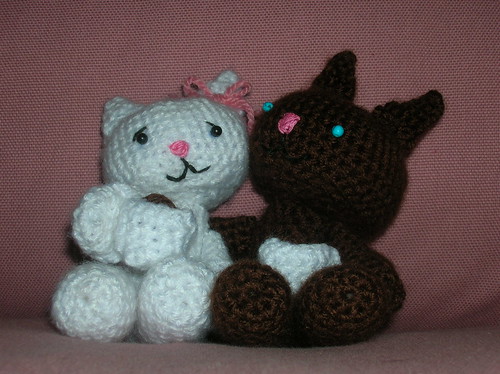
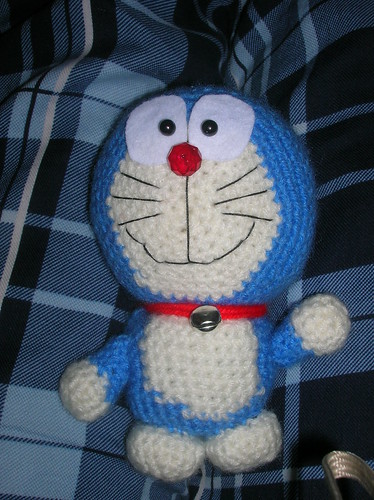
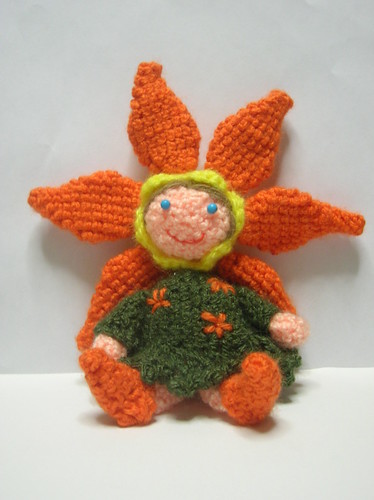
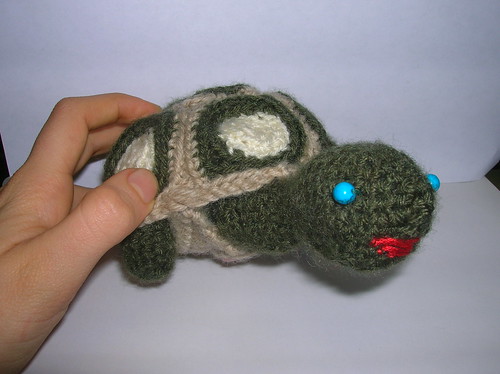
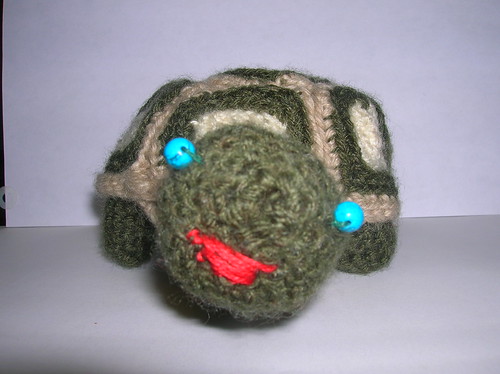
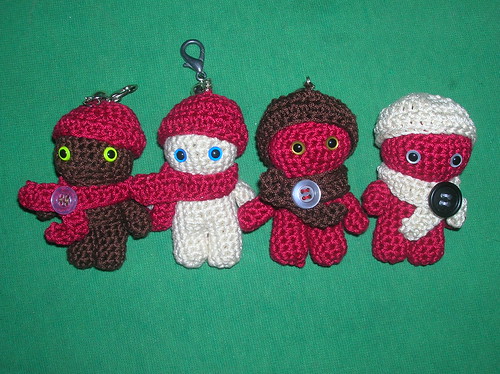
Queste piccole creaturine innominate (le ho chiamate tutte Him, plurale Them) sono molto semplici e veloci da fare e mi mettono molta allegria. Se usate un filato abbastanza fino (io ne ho usato uno adatto per l'uncinetto 2,5) potete montare dei simpatici portachiavi. Fino ad ora ne ho fatti 4, ognuno con delle piccole modifiche rispetto al precedente riguardo la lughezza delle braccia, delle gambe, la dimensione della testa...
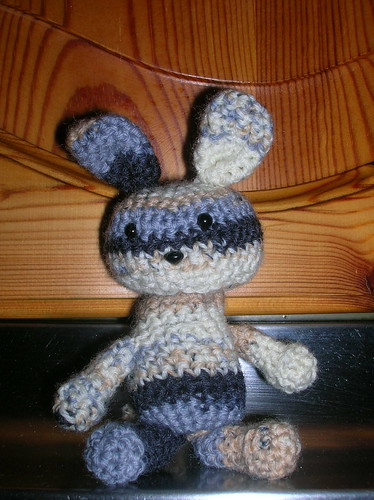
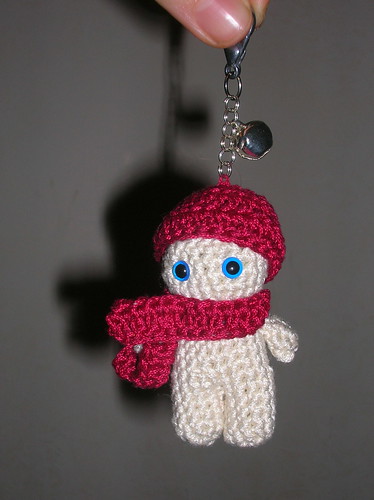
Lo schema che posto è quello per l'ultimo Him, che è quello che a me piace di più. Se volete provarli, vi consiglio di fare anche voi piccole modifiche, per trovare il pattern che vi soddisfa maggiormente.

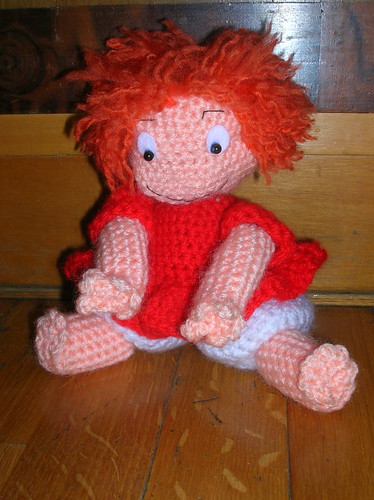
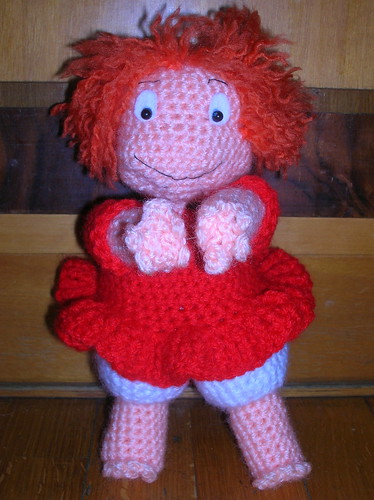
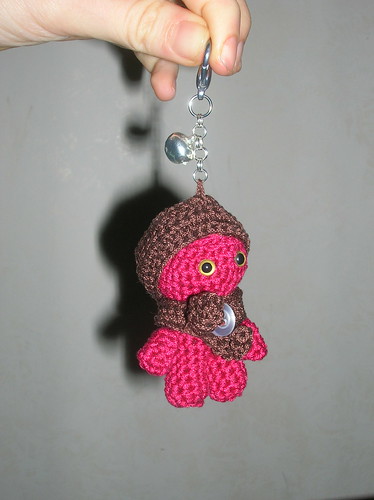
These tiny creatures witouh a name (I called them Him, when they're all togheter Them) are very simple and fast to create; they make me happy! If you use a small yarn (I used a cotton suitable for a 2,5 mm hook) you can create funny keychains.
So far I made 4 Him, each one has little variations from the previous. For example I changed The lenght of arms, body, and legs, the head's size...
The pattern I'll post is the one for the last Him on the right. If you make one of them, it would be fun you'd do some variations to find your perfect pattern for a Him.

Legs:
1) 5 sc with a MR
2) 2 sc in each st (10)
3-5) sc in each st around (10)
join with slip stitch, finish off leaving a long tail for sewing the legs together.
Make the second leg, don't finish it off. Whip stitch the two legs together using your yarn needle through 4 stitches. Your working loop should be on the outside of the circle and not stitched through. close off the yarn. you should have an eight-like shape of 16 st. Continue working the body.

Body:

1) 7 sc, 1 inc, 7 sc, 1 inc. (18)
2-5) sc in each st around (18)
6) *1 sc, 1 dec* 6 times (12)
7) sc in each st around (12)
8) *1 sc, 1 inc* 6 times (18)
9) *2 sc, 1 inc* 6 times (24)
10) *3 sc, 1 inc* 6 times (30)
11-13) 1 sc in each st around (30) (I inserted eyes between rounds 11 and 12)
14) *3 sc, 1 dec* 6 times (24)
15) *2 sc, 1 dec* 6 times (18)
16) *1 sc, 1 dec* 6 times (12)
17) 6 dec (6)
Finish off.

Arm(make 2):

1) 6 sc in MR
2-4) sc in each st around (6)
Finish off leaving a yarn tail to sew arms to he body

Hat:

1) 6 sc in MR
2) 6 inc (12)
3) *1 sc, 1 inc* 6 times (18)
4) *2 sc, 1 inc* 6 times (24)
5) *3 sc, 1 inc* 6 times (30)
6) 1 sc in each st around (30)
7-8) 1 dc in each st around (30)
Join with sl st, finish off

Scarf:

Chain approximately 35 (it depends on how long you want it)
From second ch from hook dc in each ch. Finish off

Sew the arms, the hat and the scarf to the body

Him

Him

If you create something with my patterns, I'd like very much to see it. If you want you could send me the image link via comment, I'd be very glad!

domenica 21 marzo 2010

Cappello-orso/ Crochet bear hat

Ho realizzato questo morbidissimo cappellino per il concorso di carnevale del sito Amigurumi word.
Il pattern che avrei dovuto seguire è quello per fare questo Panda Bear hat. Ho fatto un po' di modifiche quindi posto il pattern che ho usato. Per la base io ho usato un filato abbastanza grosso e un'uncinettto 5 mm,se usate un uncinetto più piccolo fate uno o due giri di aumenti in più. Per i pom pom e l'interno delle orecchie ho usato un filato più fine e un uncinetto da 3,5 mm.


I made this soft and warm hat for the Carnival contest of the site Amigurumi word.
I' should have followed this pattern: Panda Bear hat. I made some changes so I'll post my pattern. For the body of the hat I used a thick yarn and a 5 mm hook, if you use a smaller hook you should add 1 or 2 round of increse. for the pom pom e and the inner ears I used a smaller yarn and a 3,5 mm hook.

Crochet Bear hat

BEARY HAT

Body (worked in rounds without joining each round)

Make 4sc in a magic ring

Round 1: 2 hdc in ea st (8 sc)

Round 2: 2 hdc in ea st (16 sc)

Round 3: (hdc in next st, 2 hdc in next st) repeat around (24 Sts)

Round 4: (hdc in next 2 st, 2 hdc in next st) repeat around (32 Sts)

Round 5: (hdc in next 3 st, 2 hdc in next st) repeat around (40 Sts)

Round 6: (hdc in next 4 st, 2 hdc in next st) repeat around (48 Sts)

Round 7: (hdc in next 5 st, 2 hdc in next st) repeat around (56 Sts)

Round 8: (hdc in next 6 st, 2 hdc in next st) repeat around (64 Sts)

Round 9: (hdc in next 31 st, 2 hdc in next st) repeat around (66 Sts)

Round 10-20: hdc in each st.

Don't tie off yarn but continue working the first earflap.

Earflaps

Row 1: ch 1, 11 hdc, turn (12 Sts)

Row 2: ch 1, 12 hdc, turn (12 Sts)

Row 3: ch 1, hdc dec, 8 hdc, hdc dec, turn (10 Sts)


Row 4: ch 1, 10 hdc, turn (12 Sts)

Row 5: ch 1, hdc dec, 6 hdc, hdc dec, turn (8 Sts)

Row 6: ch 1, hdc dec, 4 hdc, hdc dec, turn (6 Sts)

Row 7: ch 1, hdc dec, 2 hdc, hdc dec, turn (2 Sts)

Tie off yarn.

Try out your hat to see where to reattach the yarn to do the second earflap, follow the same pattern you used for the first.


Ears (make 2)

Make 5sc in a magic ring

Round 1: 2 hdc in ea st (10 stc)

Round 2: 2 hdc in ea st (20 stc)

Round 3: (hdc in next st, 2 hdc in next st) repeat around (30 Sts)

Round 4-5: hdc in al st around

Round 5:
(hdc in next st, hdc dec) repeat around (20 Sts)

Round 6:
hdc dec all around (10 Sts)
Tie off.

Inner ear (make two using pink yarn)

Make 6 sc in a magic ring

Round 1: 2 sc in ea st (12 sc)

Round 2: (sc in next st, 2 scc in next st) repeat around (18 Sts)

Round 3: (sc in next 2 st, 2 sc in next st) repeat around (24 Sts)

Round 4(sc in next 3 st, 2 sc in next st) repeat around (30 Sts)
Tie off.

Assemble the two part of the ears and sew them to the body.

Tassels (make 2)
Make a pom pom with pink yarn and tie it with 3 long thread of brown yarn folded in two. Now you should have a pom pom tied to 6 yarn. Make a tessel and tie it to the earflaps.

Panda bear hat

Crochet Bear hat


If you create something with my patterns, I'd like very much to see it. If you want you could send me the image link via comment, I'd be very glad!

venerdì 19 marzo 2010

Torta al cioccolato/ Chocolate cake

Una torta alle fragole e cioccolata fatta con un pattern preso dal libro Amigurumi sweets

A chocolate and strawberries cake made following a pattern from the book Amigurumi sweets

crochet cake

Marionetta/ Hand puppet

Una simpatica marionetta!

Funny green puppet amigurumi!

puppet amigurumi

mercoledì 17 marzo 2010

Agnellino/ Lamb

Questo agnellino si chiama Pasqualino e l'ho fatto seguendo questo pattern.

This lamb is Pasqualino; I made it following this pattern.

Lamb amigurumi

Un'altro coniglietto/ Another bunny

Questa coniglietta si chiama Sara, è stata fatta senza schema, un po' a caso.

Sara is a sweet white bunny, done without pattern.

Bunny amigurumi

Bunny amigurumi

Bunny amigurumi

domenica 14 marzo 2010

Bunny

Ho fatto questo coniglietto con una lana melange. Il pattern l'ho preso dal libro Amigurumi kyuuto.

I made this bunny with a melange yarn. The pattern is taken from the book Amigurumi kyuuto.

bunny amigurumi

bunny amigurumi

giovedì 11 marzo 2010

ciocco & panna

Questi due gattini li ho realizzati per un contest organizzato da
http://amigurumiworld.forumcommunity.net/ per San Valentino. Sono fatti seguendo questo pattern ma apportando alcune modifiche per fare i gattini invece dell'orso. Per fare la coda ho avviato un magic ring di 7 sc e poi ho continuato a fare sc finché non era della lunghezza desiderata. In mano tengono due tazze di cioccolata calda.

This Kittens were made for the contest organized by http://amigurumiworld.forumcommunity.net/ for S. Valentine day. I made them following this pattern with some changes to make the cats instead of the bear. For the tail I made a magic ring of 7 sc and then I went on doing sc until the tail was long enough. They're holding two hot chocolate cups.

Le orecchie sono fatte così:
This is the pattern for the ears:

1-magic ring 4sc
2-sc, inc ,sc ,inc (6sc)
3-2sc, inc, 2sc, inc (8sc)
4-3sc, inc, 3sc, inc (10sc)
Finish off

ciocco&panna

ciocco&panna

Ponyo

Ho un'insana passione per i film di Miyazaki, così qualche tempo fa ho deciso di provare a riprodurre la dolcissima Ponyo. Ecco il risultato: ho usato lana misto acrilico, gli occhi sono due sagome di pannolenci con sopra attaccate due perline.

I totally love Miyazaki's film, so I decided to make a little Ponyo amigurumi... she's adorable! Here's the result: I used acrylic yarn, the eyes are made with white felt and black beads.
Ponyo amigurumi

Ponyo amigurumi

Per fare i capelli ho attaccato tanti fili arancioni e, per dare un effetto più realistico, li ho pettinati.

For the hair I used orange yarn and then, to make a more relistic effect, I brushed it.

Ho pettinato ponyo!

lunedì 8 marzo 2010

Doraemon

Doraemon il Gatto spaziale!

Doraemon the robotic cat!

If you need the english pattern e-mail me, Ican't post it here.

Pattern here

Doraemon amigurumi

Doraemon amigurumi

venerdì 5 marzo 2010

Flower fairy- Fatina

Questa fatina l'ho realizzata prendendo spunto da vari schemi. Per il corpo ho fatto la base simile a quella della prima bambolina. Il vestito l'ho fatto ad occhio. Il cappuccio l'ho fatto della grandezza della testa con un bordino ottenuto facendo 3 dc in ogni maglia.I petali li ho fatti simili a quelli della stella di Natale di Planet June
I realized this flower fairy taking inspiration from various patterns.. The body is similar to the one of prima bambolina. The hood is the same size of the head with a trim made with 3 dc in each sc. The petals are similar to Planet June's poinsettia.

amigurumi flower fairy

amigurumi flower fairy

giovedì 4 marzo 2010

Turtle toy

Una bellissima e simpaticissima tartaruga di nome Ugo, fatta seguendo questo pattern.
La cosa che mi piace di più è che il gilet che forma il guscio si può togliere lasciandola nuda :). Anche se nel sito dice che il pattern è facile, secondo me è abbastanza difficile: in totale è composto 16 pezzi (9 di guscio + 7 di corpo) e ci sono molti cambi di colore nelle placche del guscio.

Here's Ugo, a beautiful and funny turtle made following this pattern.
I like very much the fact that his gilet can be taken off leaving him naked :).
In the site the pattern is considered easy but I don't agree, actually I think it's quite difficult: it's made of 16 pieces (9 for the shell + 7 for the body) and there are many changing of colours for the shell tiles
amigurumi turtle

amigurumi turtle

amigurumi turtle