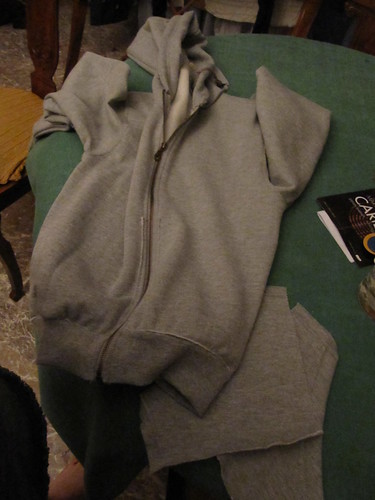
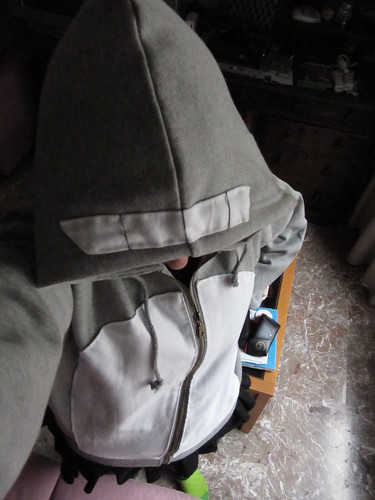
La felpa sta prendendo forma: ho cucito un'altro pezzo di stoffa sulla pancia e un sorriso sul cappuccio... fra poco sarà chiaro cosa sto facendo.
I sewed another piece of fabric on the elly and a big smile on the hood... now you could nearly guess what I'm doing with the hoodie.
mercoledì 1 dicembre 2010
martedì 30 novembre 2010
The sad hoodie step 2
Ecco il secondo passo, ho tagliato una sagoma bianca e poi l'ho cucita alla felpa.
Here's the second step, I cut a piece of white fabric and then sewed it to the hoodie.
The sad hoodie step 1
Ecco la felpa trise quando l'ho comprata.
Here's the sad hoodie as I bought her.
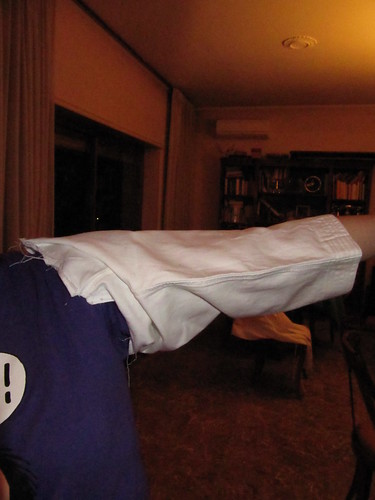
Ed ecco cosa ho fatto: ho tagliato via le tasche dalla felpa e poi ho tagliato una manica dal mio vecchio karategi perché mi serviva del tessuto bianco.
Riuscite a indovinare cosa sto facendo della mia felpa? (per ora è un po' difficile indovinare :-))
And here what I've done: I cut away the pockets from the hoodie and then I cutted a sleeve from my old karategi because I needed some white fabric.
Can you guess what I'm doing with my hoodie? (it's a bit difficult to guess :-))
I'm back :)
Ciao a tutti, sono stata via per un po' di tempo perché dovevo riorganizzare alcune cose. Adesso sono tornata con un nuovo progetto: cercare di far diventare una semplice felpa grigia particolare.
Ho comprato la felpa a porta portese, domenica scorsa, per 10 euro. Ho pensato fosse triste perché era uguale a un milione di altre felpe; quindi ho deciso di renderla differente. Ho tutto il progetto nella mia testa ma non ve lo dirò... vi faro vedere i cambiamenti passo passo.
Hi folks, I've been away for a while because I had to work some things out. Now I'm back with a new project: I'm trying to make a plain gray hoodie become special.
I bought this hoodie last sunday at the local market for 10 euros. I thought she was sad because she was just like a million other hoodies so I decided to make her different. I have a project in my mind but I won't tell you... I'll make you see every step of the transormation.
venerdì 3 settembre 2010
It's a beeee!
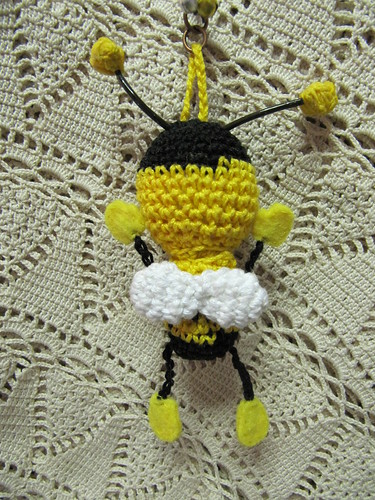
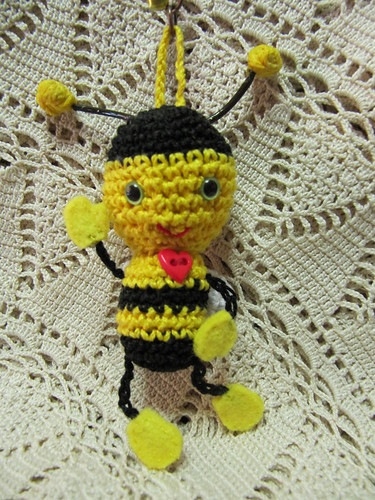
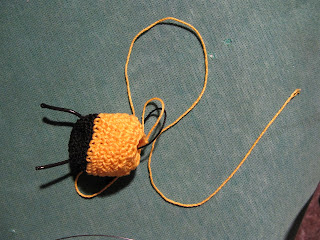
Ecco l'ultima arrivata, l'apetta Giulia. Realizzata per un'amica spagnola... spero le piaccia!
Here's the last little friend, Giulia bee. I made her for a friend from Spain... I hope she'll like her!
Pattern
Head:
Begin with black yarn
1) 6 sc in a magic ring (6 sc)
2) 6 inc (12 sc)
3) *1 sc, 1 inc* 6 times (18 sc)
4) *2 sc, 1 inc* 6 times (24 sc)
5-7) sc in each sc around (24 sc)
Change colour to yellow
8-12) sc in each sc around (24 sc)
13) *2 sc, 1 dec* 6 times (18 sc)
14) *1 sc, 1 dec* 6 times (12 sc)
Tye off leaving a long tail for sewing the head with the body.
Body:
Begin with black yarn
1) 6 sc in a magic ring (6 sc)
2) 6 inc (12 sc)
3) *1 sc, 1 inc* 6 times (18 sc)
4-5) sc in each sc around (18 sc)
Change colour to yellow
6-7) sc in each sc around (18 sc)
Change colour to black
8-9) sc in each sc around (18 sc)
Change colour to yellow
10-11) sc in each sc around (18 sc)
12) *1 sc, 1 dec* 6 times (12 sc)
Wings (make 2):
Use white yarn:
1) 5 sc in a magic ring (5 sc)
2) 5 inc (10 sc)
3-4) sc in each sc around (10 sc)
5) 5 dec (5 sc)
Finish off, leaving a long tail to sew the wings togheter.
For the legs I made 22 ch with black yarn, then insert the chain in the bottom of the body. Same thing for the arms but with only 18 ch. For the hand and the foot I used 8 little pieces of yellow felt and sew them at the end of the chain.
To make the antennas I used a black scubidù and I putted two little balls of yellow yarn at the top.
Sew the mouth and insert the eyes. Sew the wings together and then to the body. Attach the body to the head...
You've finished, enjoy you're buzzing bee!
giovedì 2 settembre 2010
Another wip...
Sono tornata dalle vacanze... e ho ripreso subito in mano l'uncinetto! Sto realizzando un piccolo amigurumi da regalare ad una simpaticissima amica spagnola.
È quasi finito... domani vi farò vedere le foto, intanto vi lascio con queste foto del lavoro in realizzazione!
Non è difficile capire che pupazzetto sto facendo... ;-)
I just came back from my holidays... and I've already started crocheting! I'm making a little amigurumi for a nice spanish girl.
It's almost finished... tomorrow I'll post the pics, in the meantime I'll leave you with the photos of the work in progress!
It shouldn't be difficult to understand what animal I'm making... ;-)
martedì 20 luglio 2010
Oggi vorrei mostrarvi qualche lavorettto che è stato fatto seguendo i miei pattern.
Today I'll show you some work made following my patterns.
Un piccolo Chtulhu è stato fatto da Jade che lo ha pubblicato sul suo profilo di Deviantart.
A little Chtulhu was made by Jade and published on her Deviantart.
Un alieno fatto da amigurumicat, è di due tonalità di viola e viene dal pianeta Lampone!
An alien made by amigurumicat, it's in two shade of violet and he comes from Blackcurrant!
Una magliettina multicolor per ipod fatta dalla bravissima Darkshakira!
A multi-coloured I-pod hoodie made by Darkshakira!
Grazie a tutte per aver provato i miei pattern e avermelo fatto sapere! :-)
Thank you very much for trying my pattern and letting me know! :-)
lunedì 19 luglio 2010
Felt capsicum keychain
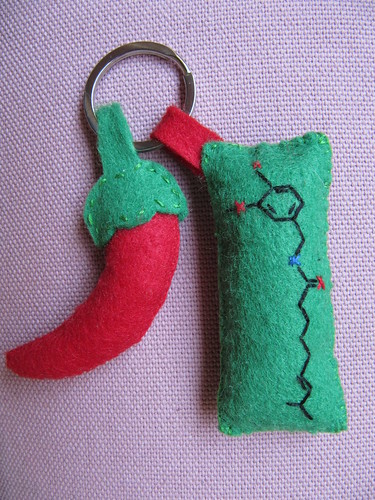
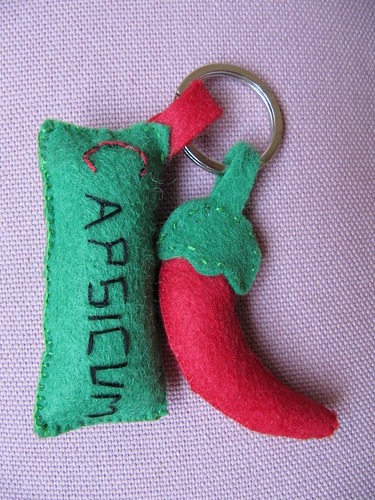
Ho realizzato questo portachiavi in feltro per Cecilia, una simpaticissima donna che su internet usa il nickname Capsicum (il nome scientifico del peperoncino).
è composto da due parti: un piccolo peperoncino rosso rosso e un cuscinetto con ricamato da una parte il suo nickname e dall'altra la formula di struttura della capsaicina (la molecola che da al peperoncino il sapore piccante). Spero proprio che le piaccia!
I realised this felt keychain for Cecilia, a very nice woman who uses the nickname Capsicum (the scientific name of the pepper) in internet.
It's made of two pieces: a small bright red pepper and a little cushion with embroidered on one side her nickname and on the other side the structural formula of capsaicin (the molecule which gives pepper his spicy flavour). I hope sheìll like it!
P.S. Vorrei partecipare a questo contest organizzato su deviant art, dovrei creare una bambola che mi rappresenta... spero di riuscirci!
P.S. I would like to join this contest organised by a deviant art, I should create a plushie which represents myself ... I hope I can!
sabato 17 luglio 2010
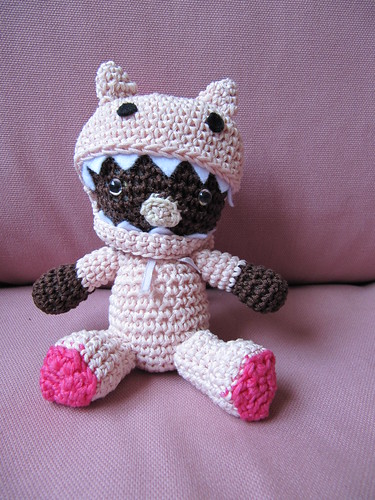
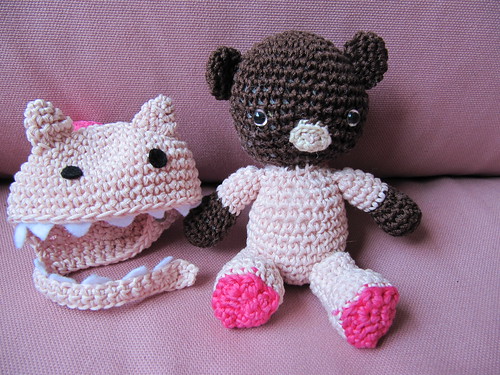
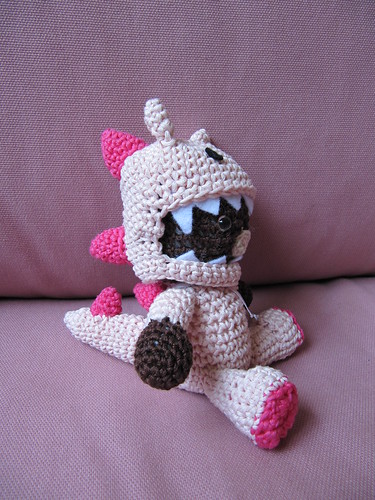
Teddy bear in a dragon suit
Ecco l'ultima fatica, un 'orsetto travestito da draghetto rosa. Per il pattern non ho ancora deciso se pubblicarlo sul blog o venderlo su Etsy.
Vi piace? Non è dolcissimo?
Here's my last work, a teddy in a pink dragon suit. I still haven't decided if I'll write the pattern here or I'll sell it on Etsy.
Do you like it? Isn't he a sweetie?
martedì 13 luglio 2010
Day of the tentacle 2
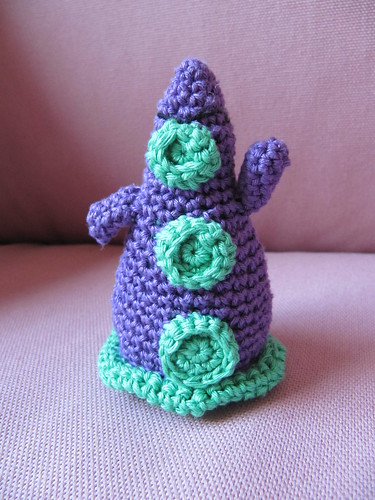
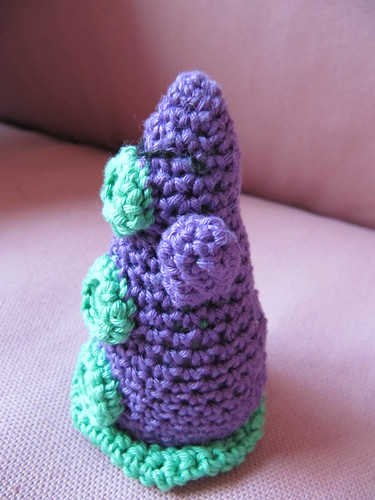
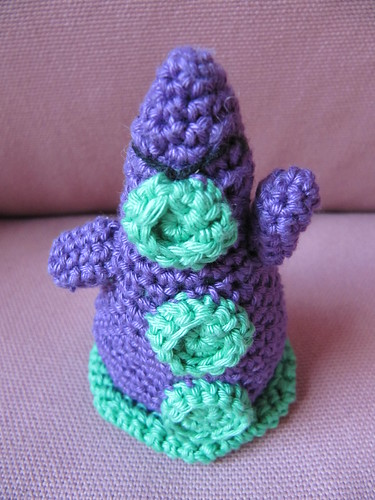
Ho fatto anche il tentacolo viola!
Il filato non è lo stesso, è un Filo di Scozia, più duro dal cotone che ho usato per il tentacolo verde. Ho lavorato con un uncinetto da 2,5 mm.
I made the purple tentacle!
The yarn isn the same, it's a Filo di Scozia, quite tighter then the cotton I used for the green tentacle. I worked with a 2,5 mm hook.
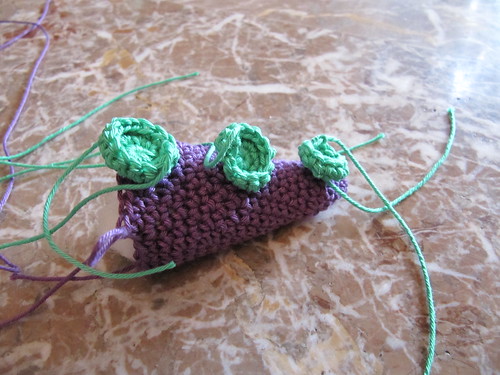
Ho seguito lo stesso schema del tentacolo verde ma, una volta ottenuti tutti i pezzi, ho notato che il corpo era troppo piccolo, quindi ho dovuto aggiungere qualche giro. Inoltre ho fatto le braccia e il monociglio.
I followed the same pattern I used for the green tentacle but, once crocheted all the pieces, I noticed the body was too small, so I had to add some rounds. I made also the unibrow and the arms.
Pattern:
Body
Arrive to round 21 of the green tentacle body
22- 12 sc, inc, 12 sc, inc (28 sc)
23- sc in each sc around (28 sc)
24- 13 sc, inc, 13 sc, inc (30 sc)
25 and 26- sc in each sc around (30 sc)
Base, suckers
The same as for the green tentacle
Arm (make two)
1- 6 sc in a Magic ring
2- 2 sc, inc, 2 sc, inc (8 sc)
3- to 6- sc in each sc around (8 sc)
Finish off
Sew the arms to the body, the height must be beetween the small and the medium sucker, the left arm must point upwards.
Sew a black unibrow just upside the small sucker.
Finish the tentacle just like the green one.
Here's your purple tentacle!
domenica 11 luglio 2010
Day of the tentacle
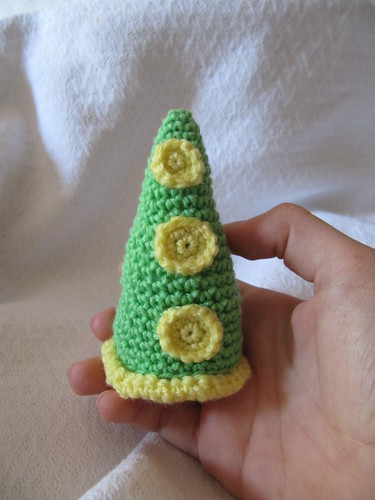
"Day of the tentacle" è stato uno dei primi e più bei videogiochi a cui ho giocato. Vedendo questa foto su flickr, ho pensato che sarebbe stato carino e semplice fare un tentacolo amigurumi.
Di sicuro qualcun'altro prima di me ha avuto questa idea, ma lo schema non l'ho copiato da nessuno, è originale. Per ora ho fatto il tentacolo verde, quando andrò a comprare il cotone adatto farò pure quello viola.
"Day of the tentacle" is one of my favourite videogames and maybe the first I played. Seeing this photo on flickr, I thought it would have been nice and simple to make an amigurumi tentacle.
Surely someone else has had this idea earlier than me, but this pattern is not copied, it's original. Until now I only made the green tentacle,but when I buy the right cotton, I'll make the purple tentacle too.
Here's the pattern:
Body
1- 4 sc in a magic ring
2- sc, inc, sc, inc (6 sc)
3- 2 sc, inc, 2 sc, inc (8 sc)
4- 3 sc, inc, 3 sc, inc (10 sc)
5- sc in each sc around (10 sc)
6- 4 sc, inc, 4 sc, inc (12 sc)
7- sc in each sc around (12 sc)
8- 5 sc, inc, 5 sc, inc (14 sc)
9- sc in each sc around (14 sc)
10- 6 sc, inc, 6 sc, inc (16 sc)
11- sc in each sc around (16 sc)
12- 7 sc, inc, 7 sc, inc (18 sc)
13- sc in each sc around (18 sc)
14- 8 sc, inc, 8 sc, inc (20 sc)
15- sc in each sc around (20 sc)
16- 9 sc, inc, 9 sc, inc (22 sc)
17- sc in each sc around (22 sc)
18- 10 sc, inc, 10 sc, inc (24 sc)
19- sc in each sc around (24 sc)
20- 11 sc, inc, 11 sc, inc (26 sc)
21 and 22- sc in each sc around (26 sc)
Finish off.
Small sucker:
1- 5 sc in a magic ring
2- 5 inc (10 sc)
3- sc in each sc around (10 sc)
Finish off.
Medium sucker:
1- 6 sc in a magic ring
2- 6 inc (12 sc)
3- sc in each sc around (12 sc)
Finish off.
Big sucker:
1- 7 sc in a magic ring
2- 7 inc (14 sc)
3- sc in each sc around (14 sc)
Finish off.
Base:
1- 7 sc in a magic ring
2- 7 inc (14 sc)
3- *1 sc, 1 inc* seven times (21 sc)
4- *2 sc, 1 inc* seven times (28 sc)
5- *3 sc, 1 inc* seven times (35 sc)
6- *4 sc, 1 inc* seven times (42 sc)
7- sc in each sc around (42 sc)
8- *4 sc, 1 dec* seven times (35 sc)
9- *3 sc, 1 inc* seven times (28 sc)
Finish off.
Folding a little the base to the centre, sew the base border (ninth round) to the sixth round.
Sew the suckers to the body.
Stuff the body and sew the base together with the body.
Enjoy your plushie green tentacle!
venerdì 9 luglio 2010
Vi volevo far vedere la versione di miciodani del mio portachiavi. Mi sembra molto carino, specialmente il cappellino bicolore, e mi ha fatto molto piacere che lei abbia provato a fare il mio schema :-)
Just wanted to make you see miciodani's version of my keychain. I think it's very nice, especially the two-tone cap, and I've been very glad she tried my pattern :-)
mercoledì 7 luglio 2010
Comig soon
Sono stata molto impegnata in questo periodo e non ho aggiornato il blog.
Ho creato un nuovo pattern originale per uno swap su Flickr con tema "animali fantastici". Ho spedito il pacco la settimana scorsa e spero che arrivi presto. Appena arriverà a destinazione posterò il pattern e le foto dell'amigurumi... è molto bello, quindi continuate a seguirmi!
I've been very busy this period and I didn't update the blog.
I made a new original pattern for a Flickr fantastic animal swap. I sent the package last week, I hope it'll arrive soon. As soon as it arrives I'll post the pattern and the photo of the amigurumi... it's very beautiful, so stay tuned!
giovedì 3 giugno 2010
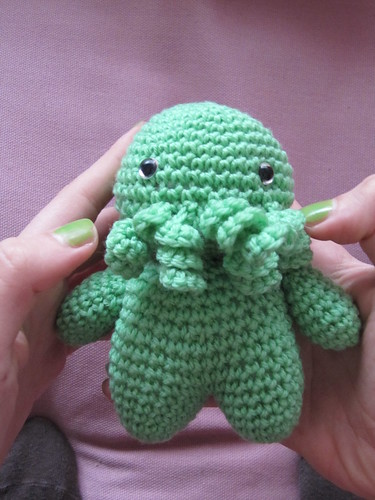
Baby Chtulhu
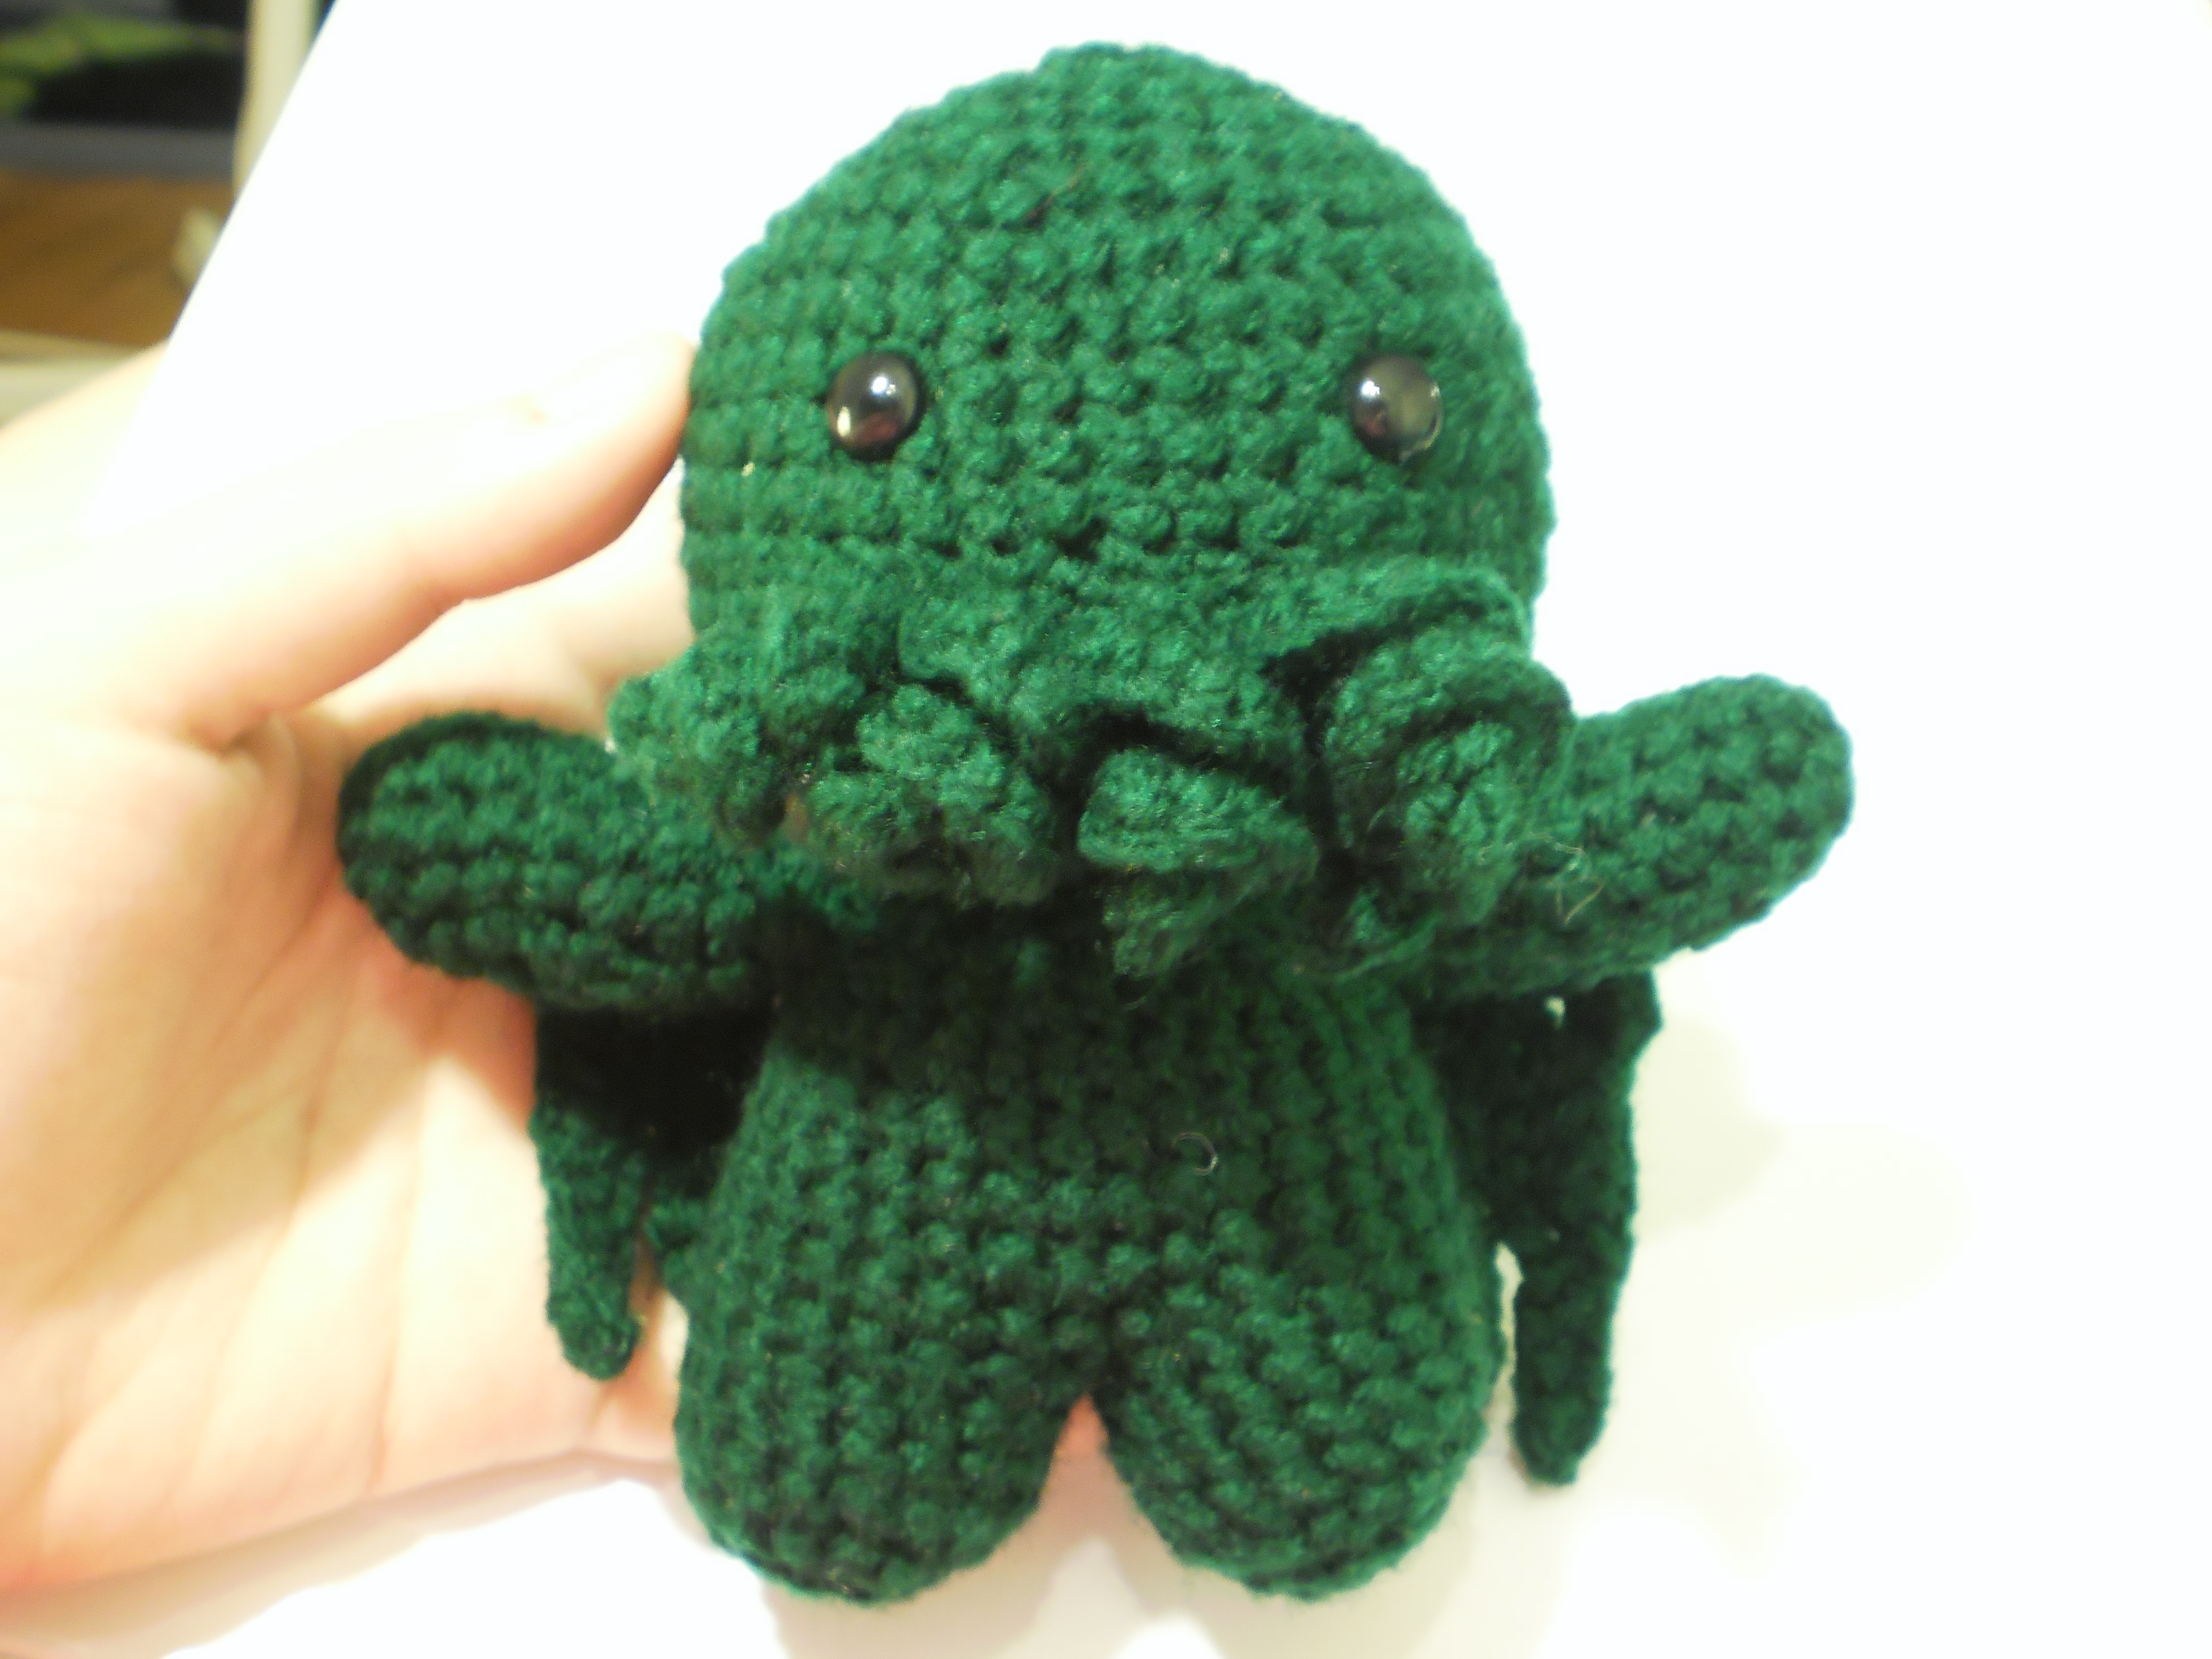
Ecco l'ultimo arrivato: Baby Chtulhu! Fa un po' il prepotente con gli altri amigurumi...
Qui il pattern, che ho modificato un poco per fargli anche le gambe.
Here's the new born: Baby Cthulhu! He's a little bossy with the other amigurumis...
Here's the pattern, I modified it a little to make him the legs too.
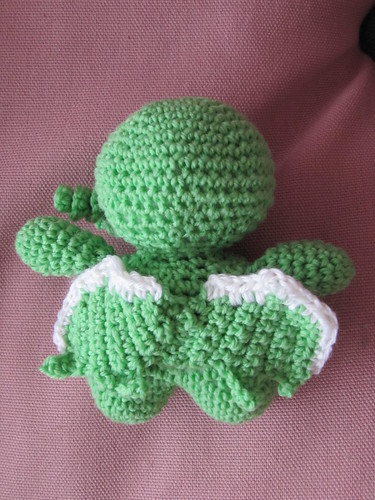
Ecco il pattern modificato:
Here's the modified pattern:
Special Stitches
In the pattern I’m going to call the Cthulhu’s tentacles a coil. When you see coil, do this:
coil: chain 9, 3 sc in third chain space from hook, 3 sc in each of next six spaces.
If you find the chain spaces too small to work 3 single crochets in, try making the chain with a hook that’s one size larger.
Head
6 sc in a magic ring
RND 1: work 2 sc in each st around. (12 stitches)
RND 2: *sc in first st, 2 sc in next st*, repeat around (18 stitches)
RND 3: *sc in first 2 st, 2 sc in next st*, repeat around (24 stitches)
RND 4: *sc in first 3 st, 2 sc in next st*, repeat around (30 stitches)
RND 5: *sc in first 4 st, 2 sc in next st*, repeat around (36 stitches)
RND 6: *sc in first 5 st, 2 sc in next st*, repeat around (42 stitches)
For RNDs 7-10 sc into each st around (42 stitches)
RND 11: (tentacle round!) sc in first 17 st, *coil, sc in next 2 st* repeat 5 times (so you have five tentacles), sc in each st to end of round. (42 stitches)
RND 12: sc in each st around (42 stitches) Note: If you have less than 42 that’s okay because we’re about to start decreasing, if you have more than 42 go back and try to fix the problem.
RND 13: *sc in first 5 st, dec in next st,* repeat around (36 stitches)
RND 14: *sc in first 4 st, dec in next st,* repeat around (30 stitches)
RND 15: *sc in first 3 st, dec in next st,* repeat around (24 stitches)
place safety eyes, using photos as a guide.
RND 17: *sc in first 2 st, dec in next st,* repeat around (18 stitches)
RND 18: *sc in first st, dec in next st* repeat around (12 stitches)
Fasten off.
Legs:
6 sc in a magic ring
RND 1: work 2 sc in each st around. (12 stitches)
RND 2: *sc in first st, 2 sc in next st*, repeat around (18 stitches)
For RNDs 3-6 sc into each st around (18 stitches)
Join with slip stitch, finish off leaving a long tail for sewing the legs together.
Make the second leg, don't finish it off. Whip stitch the two legs together using your yarn needle through 6 stitches. Your working loop should be on the outside of the circle and not stitched through. Close off the yarn. You should have an eight-like shape of 30 st. Continue working the body.
For RNDs 7-11 sc into each st around (30 stitches)
RND 12:*sc in first 3 st, dec in next st,* repeat around (24 stitches)
RND 13:*sc in first 2 st, dec in next st,* repeat around (18 stitches)
RND 14: *sc in first st, dec in next st,* repeat around. (12 stitches)
Finish off.
Sew head and body together
Arms (make 2)
4 sc in magic ring
RND 1: work 2 sc in each st around (8 stitches)
RND 2: *sc in first st, 2 sc in next st*, repeat around (12 stitches)
switch to shirt colour for next round, if making a shirt.
RNDs 3-5: sc in each st around (12 stitches)
sl st into next stitch, finish off leaving long tail for sewing.
Wings (make two)
Ch 4. Turn and do 1 sc in each of next 3 ch sps. Ch 1, turn. 3 sc, ch 4. turn. 3 sc on chain, 3 hdc on the three sc. Ch1, turn. 3 sc, ch 5, 4 sc in chain, 3 hdc. Ch1, turn. 4 sc, ch 6, 5 sc in chain, 4 hdc. Ch 3 *Work appox. 8 dc along the top edge of the wing (opposite the pointy bits). Sl St into first Ch, or near first Ch. Fasten off.
martedì 25 maggio 2010
Felt felt felt
Avevo ordinato dei coloratissimi fogli di feltro su Etsy e mi sono arrivati l'altro ieri, dopo più di un mese dalla spedizione... ormai avevo perso la speranza.
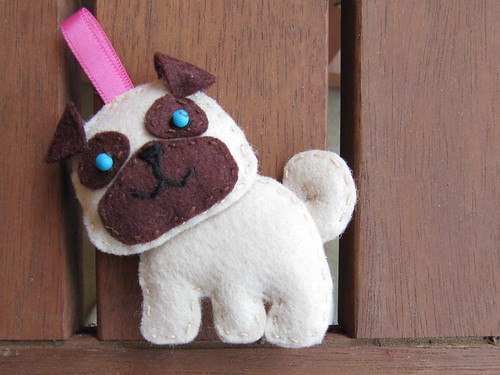
Il primo lavoretto che ho fatto è questo portachiavi a forma di carlino.
I bought many colorful felt sheets on Etsy and they arrived the day before yesterday, after more than a month from the shipping... I had almost lost the hope.
My first work has been a pug dog keychain.
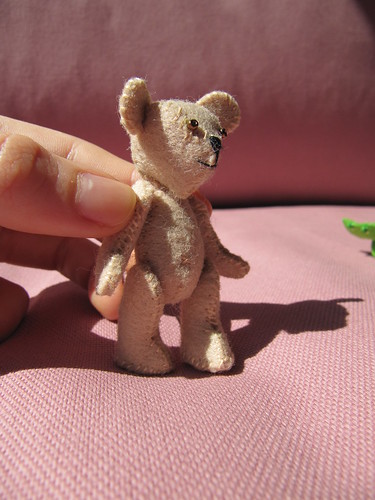
Poi ho fatto un'orsetto ...
Then I made a teddy...
...con un cappottino verde.
...with a green raincoat.
I have both templates available.
Ho entrambi gli schemi disponibili.
martedì 18 maggio 2010
Wip crochet bag
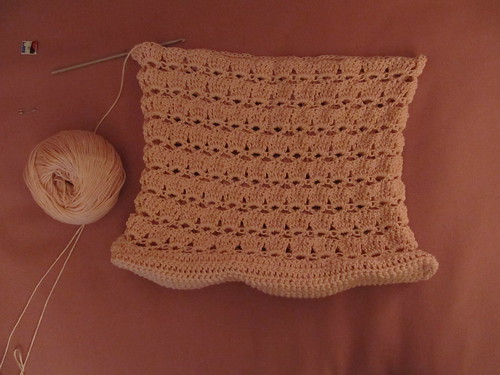
Sto facendo una borsetta all'uncinetto con un cotone rosa chiaro. Ho quasi finito il corpo, adesso devo fare la fodera e il manico. Vorrei mettere un manico in legno, oggi ho chiesto a mia madre di cercare al mercatino qualcosa di economico, speriamo abbia trovato qualcosa di bello...
I'm making a crochet bag with a pale pink cotton. I almost finished the body, now I need to do the lining and the handle. I wouls like to use a wooden handle. Today I sent my mother to the street market to seek out something cheap, I hope she found a beautiful handle...
domenica 16 maggio 2010
5 bears / 5 orsetti
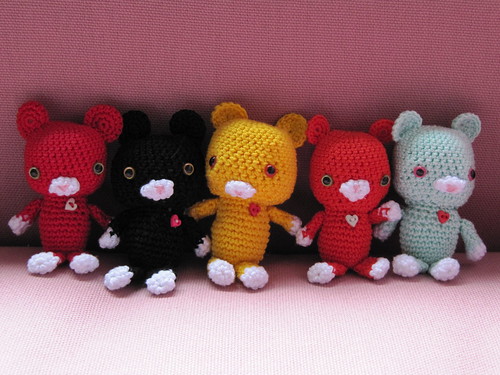
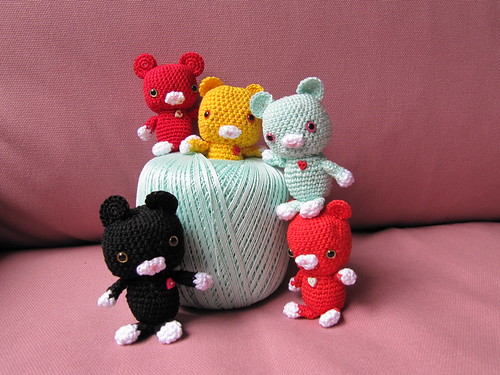
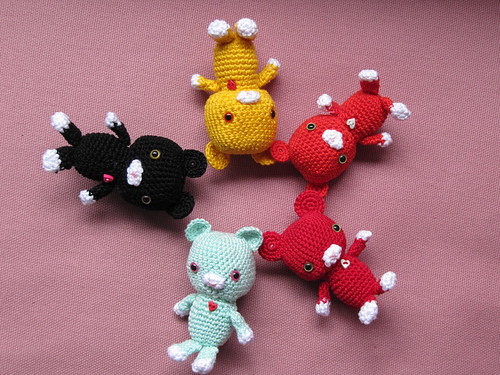
Ho completato i 5 orsetti colorati. Il pattern è quello per fare Clover, disponibile qui in pdf.
Si chiamano, da sinistra a destra, Scarlet, Liquirizia, Sunnyday, Happyness and Seashell. Non sono dolcissimi?
I finished the five bears. Il pattern is the one to make Clover, downloadable here in pdf.
Their names are, from left to right, Scarlet, Liquirizia, Sunnyday, Happyness and Seashell. Aren't they cute?
venerdì 14 maggio 2010
Wip Amigurumi bears/ Orsetti
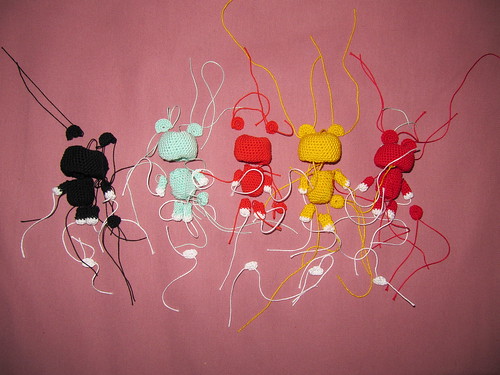
Sto facendo 5 orsetti colorati, devo solo imbottirli e cucire le parti.
Nel prossimo post inserirò la foto degli orsetti finiti e il link al pattern gratuito.
Qualche suggerimento per i nomi? Per ora quello nero si chiamerà Liquirizia, quello giallo Sunnyday, gli altri ancora non so... Aiutatemi :-)
I'm making 5 colorful bears, I just have to stuff them and sew the body parts.
Next post I'll make a photo of the finished project and the pattern link.
Any suggestion for their names? I only decided the black one (Liquirizia, in italian means liquorice) and the yellow one (Sunnyday); I don't know how to call the others dudes... Help me :-)
domenica 2 maggio 2010
Walkman hoodie/ Felpa per il walkman
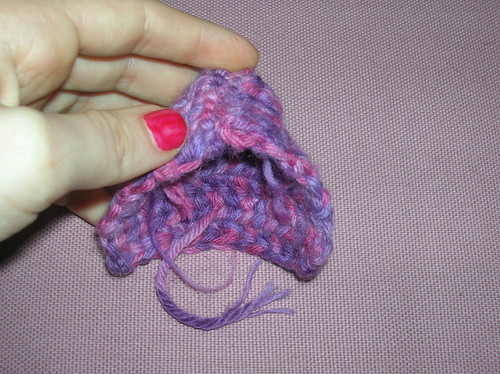
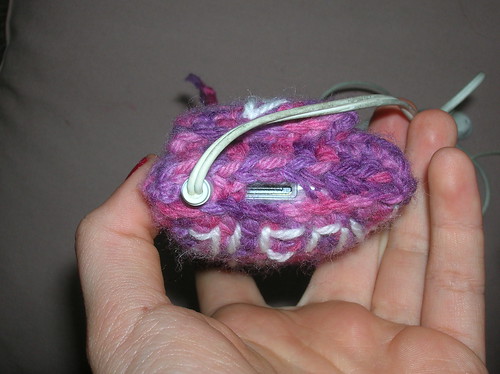
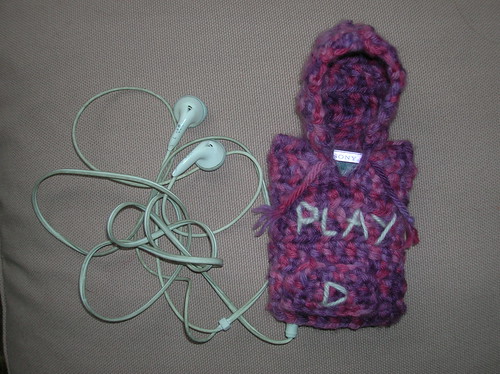
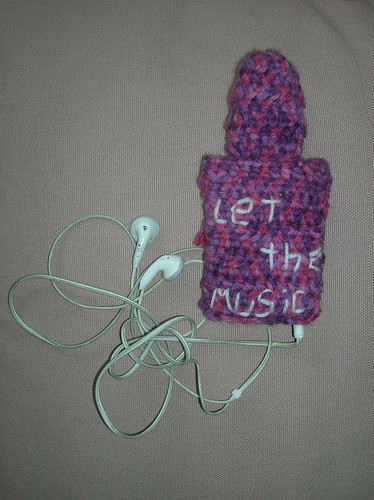
Durante un noioso pomeriggio piovoso ho realizzato questa simpatica felpa per il mio walkman. Ho preso ispirazione da questo pattern che è per l'uncinetto tunisino. In pratica io l'ho tradotto in un pattern per uncinetto tradizionale e ho aggiunto qualche piccolo particolare.
During a boring rainy sunday I created this funny hoodie for my walkman. I took my inspirsation from this pattern which is for tunisian crochet. I translated in into a traditional crochet pattern, making few changes.
Crochet hook 5 mm
Pattern
Body:
13 ch turn
Starting from third stitch from hook, 11 hdc,2 ch turn
11 hdc, 2 ch turn (11 times)
Begin working the left neck side
3 hdc, 2ch, turn
1 hdc, inc, 1 hdc, 2 ch, turn
2 hdc, inc, 1 hdc, 2 ch, turn
2 hdc, inc, 2 hdc.
Tie off yarn.
Attach the yarn to the right side and work the same pattern you used for the left side:
3 hdc, 2ch, turn
1 hdc, inc, 1 hdc, 2 ch, turn
2 hdc, inc, 1 hdc, 2 ch, turn
2 hdc, inc, 2 hdc, 2 ch, turn
Work hdc across the right side and then continue through the left one (12 sc), 2ch, turn
11 hdc, 2ch, turn (8 times)
Tie off yarn.
Hoodie:
ch 18
hdc in second ch from hook and till the last ch, ch 2, turn
hdc in each sc, ch 2, ch 2, turn (5 times)
7 hdc, dec, 7 hdc, ch 2, turn
6 hdc, dec, 7 hdc
Tie off.
Pocket:
ch 9
sc in second sc from hook and till the last sc, 1 ch, turn
sc in each sc, 1 ch, turn
dec, 4 sc, dec, 1 ch, turn
dec, 2 sc, dec
Tie off.
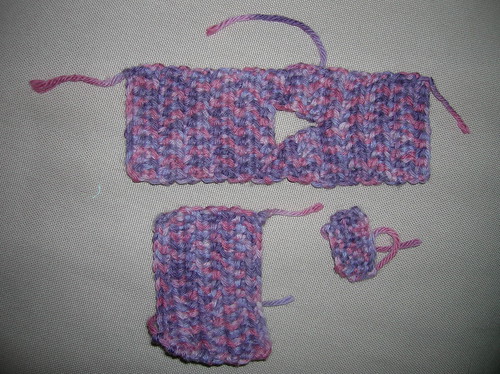
Now you should have these three pieces:
To make the hoodie, fold the rectangle in two, sew one side together and then sew the other side to the neck opening.
Sew the pocket to the body and then close all the sides of the body leaving some holes for the headphones and the usb cable.
Add the final decorations. I sewed the sentence "let the music play" and a little symbol with white yarn. Then I added two little laces near the hoodie.
If you create something with my patterns, I'd like very much to see it. If you want you could send me the image link via comment, I'd be very glad!
mercoledì 28 aprile 2010
Keychain/ portachiavi
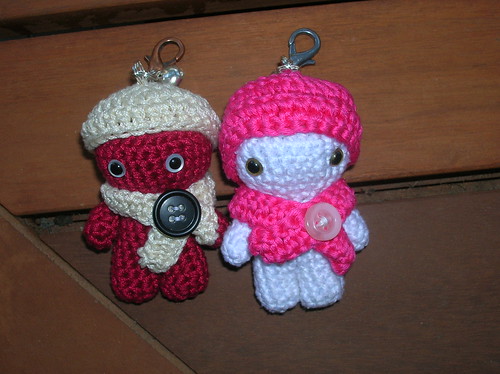
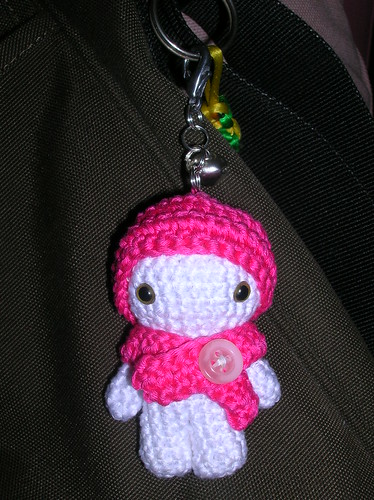
Ho fatto un'altro pupazzetto portachiavi per una signora che me lo aveva chiesto. Quello rosa e bianco è il nuovo arrivato, già ripartito. Il pattern è sempre lo stesso che avevo usato per i suoi fratellini.
I made another keychain for a friend. She liked it very much. The new born is the one white and pink, she's already gone away! The pattern is the same I used for her brothers.
If you create something with my patterns, I'd like very much to see it. If you want you could send me the image link via comment, I'd be very glad!
venerdì 23 aprile 2010
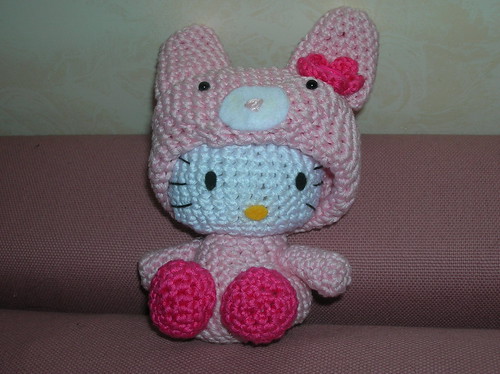
Hello kitty...in a bunny suit/ vestita da coniglietto
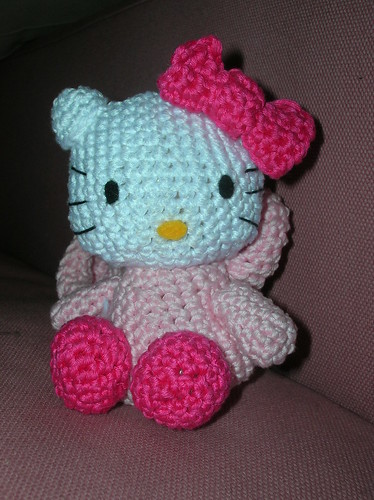
Hello kitty realizzata per il compleanno di mia zia. Ho usato un pattern di un libro giapponese. Se vi serve posso spedire la versione in ingelse o italiano via mail.
Non è dolcissima... io non amo particolarmente il personaggio, però questo amigurumi è veramente carino!
Hello kitty realised for my aunt's birthday. I used a pattern from a japanese book. If you need it I can send you the english or italian version by mail.
Isn't she sweet... I don't like very much the character but this amigurumi is really cute!
Iscriviti a:
Post (Atom)