Visualizzazione post con etichetta Pattern. Mostra tutti i post

venerdì 3 settembre 2010

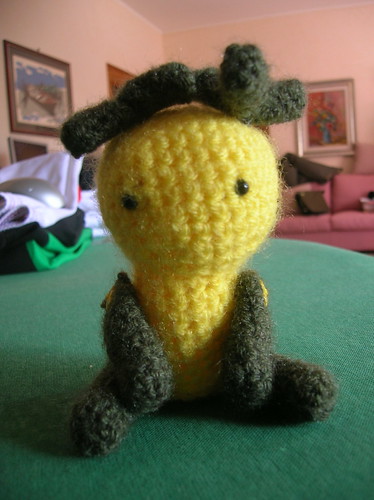
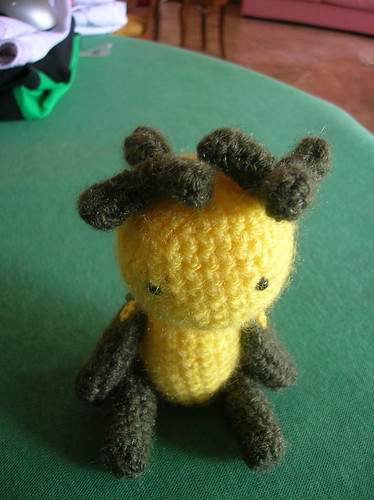
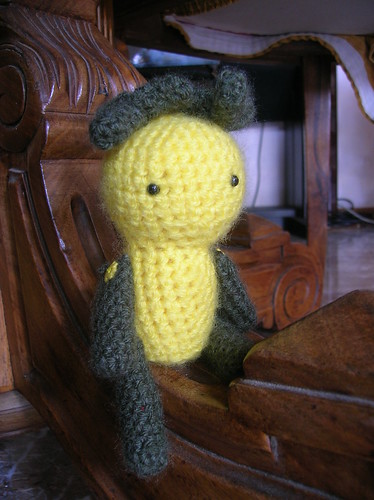
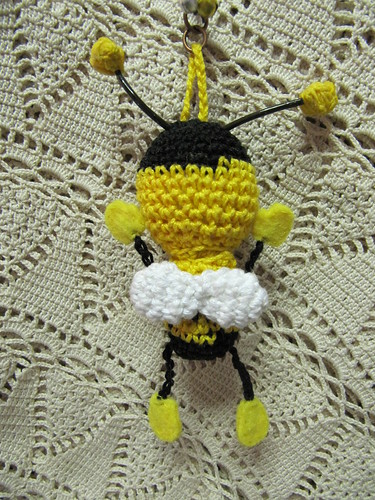
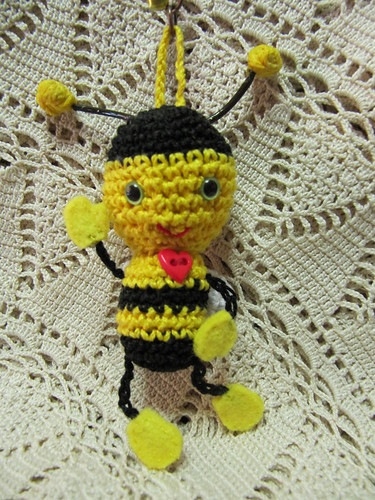
It's a beeee!

Ecco l'ultima arrivata, l'apetta Giulia. Realizzata per un'amica spagnola... spero le piaccia!

Here's the last little friend, Giulia bee. I made her for a friend from Spain... I hope she'll like her!

IMG_1000

Pattern

Head:
Begin with black yarn
1) 6 sc in a magic ring (6 sc)
2) 6 inc (12 sc)
3) *1 sc, 1 inc* 6 times (18 sc)
4) *2 sc, 1 inc* 6 times (24 sc)
5-7) sc in each sc around (24 sc)
Change colour to yellow
8-12) sc in each sc around (24 sc)
13) *2 sc, 1 dec* 6 times (18 sc)
14) *1 sc, 1 dec* 6 times (12 sc)
Tye off leaving a long tail for sewing the head with the body.

Body:
Begin with black yarn
1) 6 sc in a magic ring (6 sc)
2) 6 inc (12 sc)
3) *1 sc, 1 inc* 6 times (18 sc)
4-5) sc in each sc around (18 sc)
Change colour to yellow
6-7) sc in each sc around (18 sc)
Change colour to black
8-9) sc in each sc around (18 sc)
Change colour to yellow
10-11) sc in each sc around (18 sc)
12) *1 sc, 1 dec* 6 times (12 sc)

Wings (make 2):
Use white yarn:
1) 5 sc in a magic ring (5 sc)
2) 5 inc (10 sc)
3-4) sc in each sc around (10 sc)
5) 5 dec (5 sc)
Finish off, leaving a long tail to sew the wings togheter.

For the legs I made 22 ch with black yarn, then insert the chain in the bottom of the body. Same thing for the arms but with only 18 ch. For the hand and the foot I used 8 little pieces of yellow felt and sew them at the end of the chain.

To make the antennas I used a black scubidù and I putted two little balls of yellow yarn at the top.

Sew the mouth and insert the eyes. Sew the wings together and then to the body. Attach the body to the head...
You've finished, enjoy you're buzzing bee!

IMG_0997

martedì 13 luglio 2010

Day of the tentacle 2

Purple tentacle

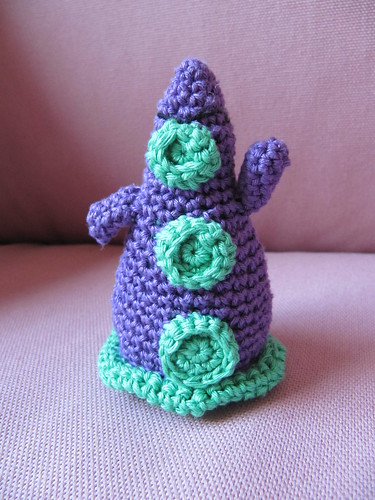
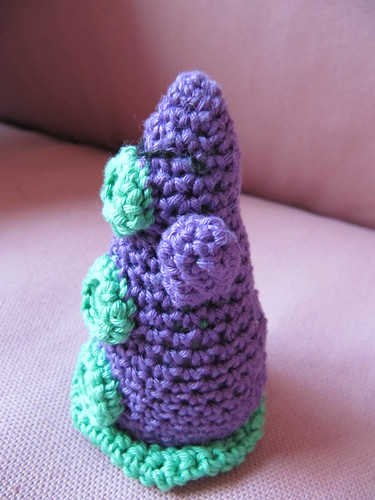
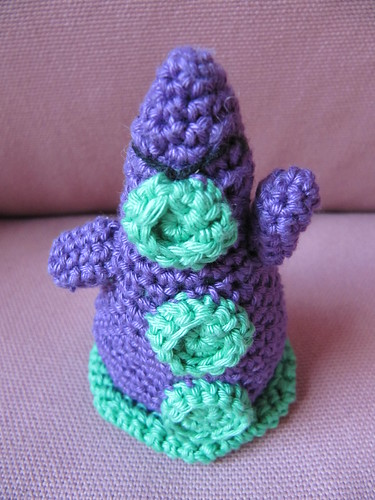
Ho fatto anche il tentacolo viola!
Il filato non è lo stesso, è un Filo di Scozia, più duro dal cotone che ho usato per il tentacolo verde. Ho lavorato con un uncinetto da 2,5 mm.

I made the purple tentacle!
The yarn isn the same, it's a Filo di Scozia, quite tighter then the cotton I used for the green tentacle. I worked with a 2,5 mm hook.

Purple tentacle

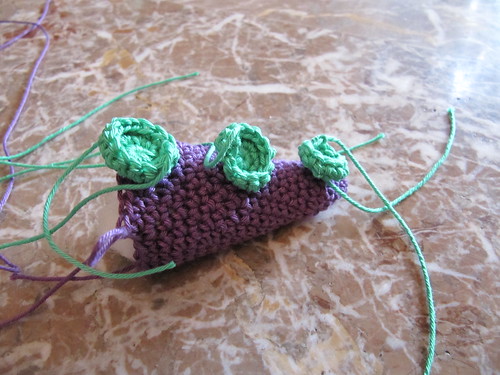
Ho seguito lo stesso schema del tentacolo verde ma, una volta ottenuti tutti i pezzi, ho notato che il corpo era troppo piccolo, quindi ho dovuto aggiungere qualche giro. Inoltre ho fatto le braccia e il monociglio.


I followed the same pattern I used for the green tentacle but, once crocheted all the pieces, I noticed the body was too small, so I had to add some rounds. I made also the unibrow and the arms.

Purple tentacle... wip

Pattern:

Body
Arrive to round 21 of the green tentacle body
22- 12 sc, inc, 12 sc, inc (28 sc)
23- sc in each sc around (28 sc)
24- 13 sc, inc, 13 sc, inc (30 sc)
25 and 26- sc in each sc around (30 sc)

Base, suckers
The same as for the green tentacle

Arm (make two)

1- 6 sc in a Magic ring
2- 2 sc, inc, 2 sc, inc (8 sc)
3- to 6- sc in each sc around (8 sc)
Finish off

Sew the arms to the body, the height must be beetween the small and the medium sucker, the left arm must point upwards.
Sew a black unibrow just upside the small sucker.

Finish the tentacle just like the green one.

Here's your purple tentacle!

Purple tentacle

domenica 11 luglio 2010

Day of the tentacle

Green tentacle

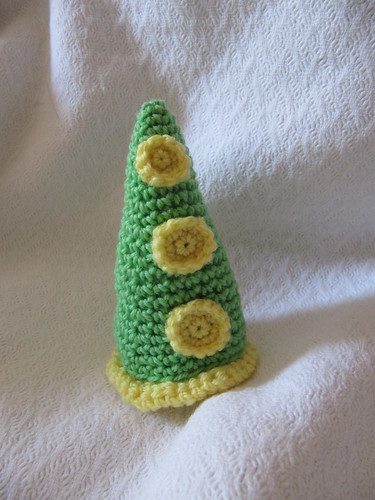
"Day of the tentacle" è stato uno dei primi e più bei videogiochi a cui ho giocato. Vedendo questa foto su flickr, ho pensato che sarebbe stato carino e semplice fare un tentacolo amigurumi.
Di sicuro qualcun'altro prima di me ha avuto questa idea, ma lo schema non l'ho copiato da nessuno, è originale. Per ora ho fatto il tentacolo verde, quando andrò a comprare il cotone adatto farò pure quello viola.

"Day of the tentacle" is one of my favourite videogames and maybe the first I played. Seeing this photo on flickr, I thought it would have been nice and simple to make an amigurumi tentacle.
Surely someone else has had this idea earlier than me, but this pattern is not copied, it's original. Until now I only made the green tentacle,but when I buy the right cotton, I'll make the purple tentacle too.

Here's the pattern:

Body

1- 4 sc in a magic ring
2- sc, inc, sc, inc (6 sc)
3- 2 sc, inc, 2 sc, inc (8 sc)
4- 3 sc, inc, 3 sc, inc (10 sc)
5- sc in each sc around (10 sc)
6- 4 sc, inc, 4 sc, inc (12 sc)
7- sc in each sc around (12 sc)
8- 5 sc, inc, 5 sc, inc (14 sc)
9- sc in each sc around (14 sc)
10- 6 sc, inc, 6 sc, inc (16 sc)
11- sc in each sc around (16 sc)
12- 7 sc, inc, 7 sc, inc (18 sc)
13- sc in each sc around (18 sc)
14- 8 sc, inc, 8 sc, inc (20 sc)
15- sc in each sc around (20 sc)
16- 9 sc, inc, 9 sc, inc (22 sc)
17- sc in each sc around (22 sc)
18- 10 sc, inc, 10 sc, inc (24 sc)
19- sc in each sc around (24 sc)
20- 11 sc, inc, 11 sc, inc (26 sc)
21 and 22- sc in each sc around (26 sc)
Finish off.

Small sucker:

1- 5 sc in a magic ring
2- 5 inc (10 sc)
3- sc in each sc around (10 sc)
Finish off.

Medium sucker:

1- 6 sc in a magic ring
2- 6 inc (12 sc)
3- sc in each sc around (12 sc)
Finish off.

Big sucker:

1- 7 sc in a magic ring
2- 7 inc (14 sc)
3- sc in each sc around (14 sc)
Finish off.

Base:

1- 7 sc in a magic ring
2- 7 inc (14 sc)
3- *1 sc, 1 inc* seven times (21 sc)
4- *2 sc, 1 inc* seven times (28 sc)
5- *3 sc, 1 inc* seven times (35 sc)
6- *4 sc, 1 inc* seven times (42 sc)
7- sc in each sc around (42 sc)
8- *4 sc, 1 dec* seven times (35 sc)
9- *3 sc, 1 inc* seven times (28 sc)
Finish off.

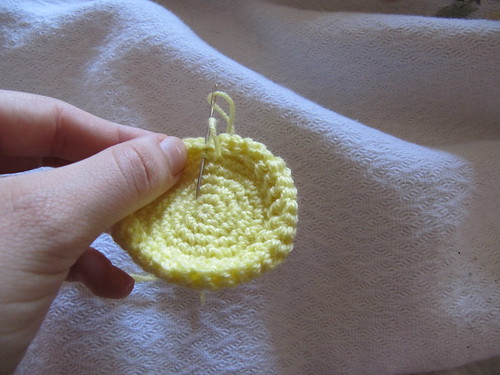
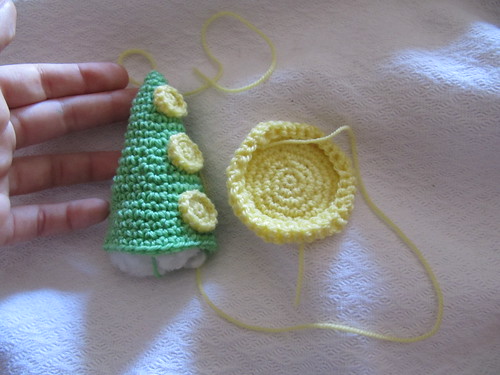
Folding a little the base to the centre, sew the base border (ninth round) to the sixth round.

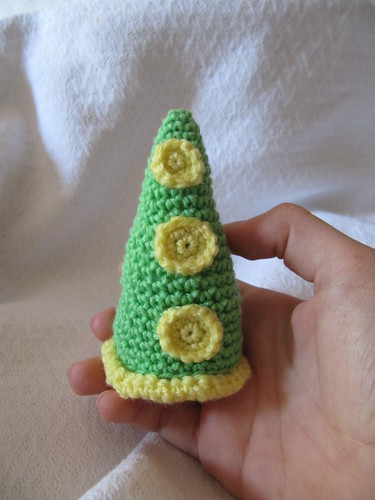
Green tentacle wip

Sew the suckers to the body.

Green tentacle wip

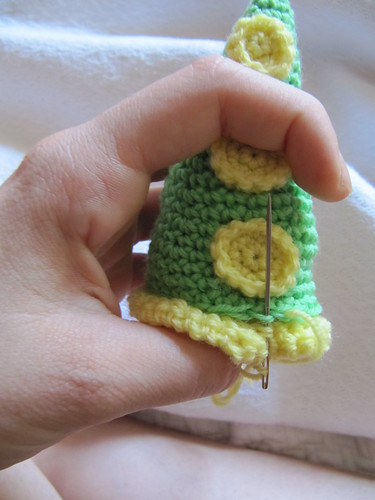
Stuff the body and sew the base together with the body.

Green tentacle wip

Enjoy your plushie green tentacle!
Green tentacle

venerdì 9 luglio 2010

Vi volevo far vedere la versione di miciodani del mio portachiavi. Mi sembra molto carino, specialmente il cappellino bicolore, e mi ha fatto molto piacere che lei abbia provato a fare il mio schema :-)

Just wanted to make you see miciodani's version of my keychain. I think it's very nice, especially the two-tone cap, and I've been very glad she tried my pattern :-)

giovedì 3 giugno 2010

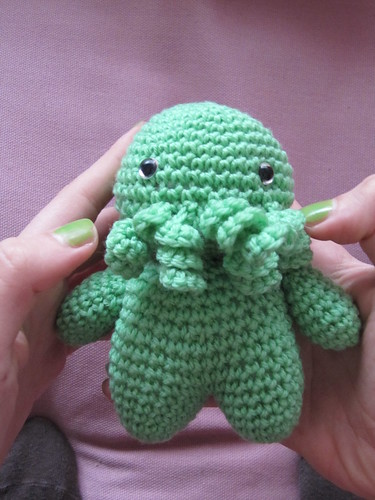
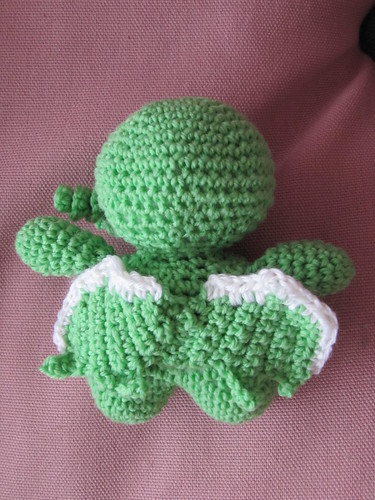
Baby Chtulhu

Baby Cthulhu Amigurumi

Ecco l'ultimo arrivato: Baby Chtulhu! Fa un po' il prepotente con gli altri amigurumi...
Qui il pattern, che ho modificato un poco per fargli anche le gambe.

Here's the new born: Baby Cthulhu! He's a little bossy with the other amigurumis...
Here's the pattern, I modified it a little to make him the legs too.
Baby Cthulhu Amigurumi

Ecco il pattern modificato:
Here's the modified pattern:


Special Stitches

In the pattern I’m going to call the Cthulhu’s tentacles a coil. When you see coil, do this:

coil: chain 9, 3 sc in third chain space from hook, 3 sc in each of next six spaces.

If you find the chain spaces too small to work 3 single crochets in, try making the chain with a hook that’s one size larger.

Head

6 sc in a magic ring
RND 1: work 2 sc in each st around. (12 stitches)
RND 2: *sc in first st, 2 sc in next st*, repeat around (18 stitches)
RND 3: *sc in first 2 st, 2 sc in next st*, repeat around (24 stitches)
RND 4: *sc in first 3 st, 2 sc in next st*, repeat around (30 stitches)
RND 5: *sc in first 4 st, 2 sc in next st*, repeat around (36 stitches)
RND 6: *sc in first 5 st, 2 sc in next st*, repeat around (42 stitches)
For RNDs 7-10 sc into each st around (42 stitches)
RND 11: (tentacle round!) sc in first 17 st, *coil, sc in next 2 st* repeat 5 times (so you have five tentacles), sc in each st to end of round. (42 stitches)
RND 12: sc in each st around (42 stitches) Note: If you have less than 42 that’s okay because we’re about to start decreasing, if you have more than 42 go back and try to fix the problem.
RND 13: *sc in first 5 st, dec in next st,* repeat around (36 stitches)
RND 14: *sc in first 4 st, dec in next st,* repeat around (30 stitches)
RND 15: *sc in first 3 st, dec in next st,* repeat around (24 stitches)
place safety eyes, using photos as a guide.
RND 17: *sc in first 2 st, dec in next st,* repeat around (18 stitches)
RND 18: *sc in first st, dec in next st* repeat around (12 stitches)
Fasten off.

Legs:

6 sc in a magic ring
RND 1: work 2 sc in each st around. (12 stitches)
RND 2: *sc in first st, 2 sc in next st*, repeat around (18 stitches)
For RNDs 3-6 sc into each st around (18 stitches)
Join with slip stitch, finish off leaving a long tail for sewing the legs together.
Make the second leg, don't finish it off. Whip stitch the two legs together using your yarn needle through 6 stitches. Your working loop should be on the outside of the circle and not stitched through. Close off the yarn. You should have an eight-like shape of 30 st. Continue working the body.
For RNDs 7-11 sc into each st around (30 stitches)
RND 12:*sc in first 3 st, dec in next st,* repeat around (24 stitches)
RND 13:*sc in first 2 st, dec in next st,* repeat around (18 stitches)
RND 14: *sc in first st, dec in next st,* repeat around. (12 stitches)
Finish off.
Sew head and body together

Arms (make 2)

4 sc in magic ring
RND 1: work 2 sc in each st around (8 stitches)
RND 2: *sc in first st, 2 sc in next st*, repeat around (12 stitches)
switch to shirt colour for next round, if making a shirt.
RNDs 3-5: sc in each st around (12 stitches)
sl st into next stitch, finish off leaving long tail for sewing.

Wings (make two)


Ch 4. Turn and do 1 sc in each of next 3 ch sps. Ch 1, turn. 3 sc, ch 4. turn. 3 sc on chain, 3 hdc on the three sc. Ch1, turn. 3 sc, ch 5, 4 sc in chain, 3 hdc. Ch1, turn. 4 sc, ch 6, 5 sc in chain, 4 hdc. Ch 3 *Work appox. 8 dc along the top edge of the wing (opposite the pointy bits). Sl St into first Ch, or near first Ch. Fasten off.
domenica 16 maggio 2010

5 bears / 5 orsetti

I5 Bears

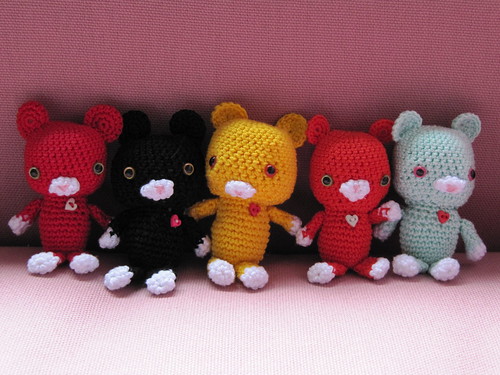
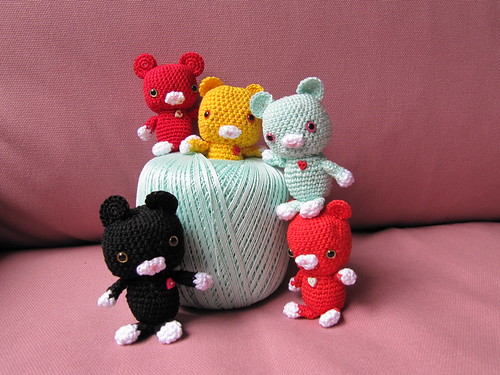
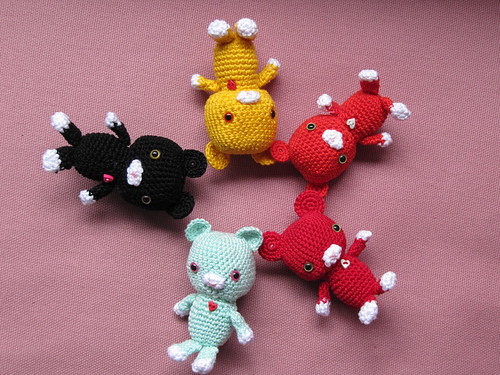
Ho completato i 5 orsetti colorati. Il pattern è quello per fare Clover, disponibile qui in pdf.
Si chiamano, da sinistra a destra, Scarlet, Liquirizia, Sunnyday, Happyness and Seashell. Non sono dolcissimi?

I finished the five bears. Il pattern is the one to make Clover, downloadable here in pdf.
Their names are, from left to right, Scarlet, Liquirizia, Sunnyday, Happyness and Seashell. Aren't they cute?

5 Bears

5 Bears

domenica 2 maggio 2010

Walkman hoodie/ Felpa per il walkman

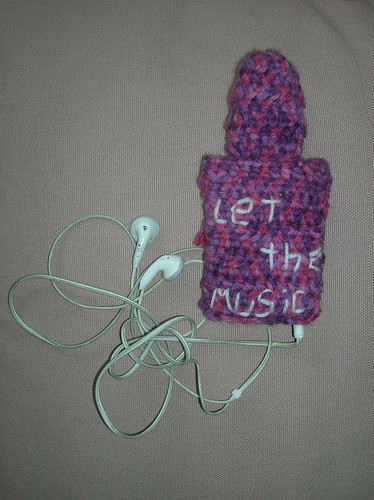
Durante un noioso pomeriggio piovoso ho realizzato questa simpatica felpa per il mio walkman. Ho preso ispirazione da questo pattern che è per l'uncinetto tunisino. In pratica io l'ho tradotto in un pattern per uncinetto tradizionale e ho aggiunto qualche piccolo particolare.

During a boring rainy sunday I created this funny hoodie for my walkman. I took my inspirsation from this pattern which is for tunisian crochet. I translated in into a traditional crochet pattern, making few changes.

Crochet hook 5 mm
Pattern

Body:
13 ch turn
Starting from third stitch from hook, 11 hdc,2 ch turn
11 hdc, 2 ch turn (11 times)

Begin working the left neck side
3 hdc, 2ch, turn
1 hdc, inc, 1 hdc, 2 ch, turn
2 hdc, inc, 1 hdc, 2 ch, turn
2 hdc, inc, 2 hdc.
Tie off yarn.

Attach the yarn to the right side and work the same pattern you used for the left side:
3 hdc, 2ch, turn
1 hdc, inc, 1 hdc, 2 ch, turn
2 hdc, inc, 1 hdc, 2 ch, turn
2 hdc, inc, 2 hdc, 2 ch, turn
Work hdc across the right side and then continue through the left one (12 sc), 2ch, turn

11 hdc, 2ch, turn (8 times)
Tie off yarn.

Hoodie:
ch 18
hdc in second ch from hook and till the last ch, ch 2, turn
hdc in each sc, ch 2, ch 2, turn (5 times)
7 hdc, dec, 7 hdc, ch 2, turn
6 hdc, dec, 7 hdc
Tie off.
Pocket:
ch 9
sc in second sc from hook and till the last sc, 1 ch, turn
sc in each sc, 1 ch, turn
dec, 4 sc, dec, 1 ch, turn
dec, 2 sc, dec
Tie off.
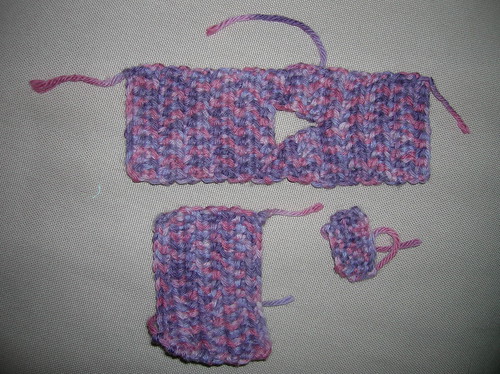
Now you should have these three pieces:
Walkman hoodie

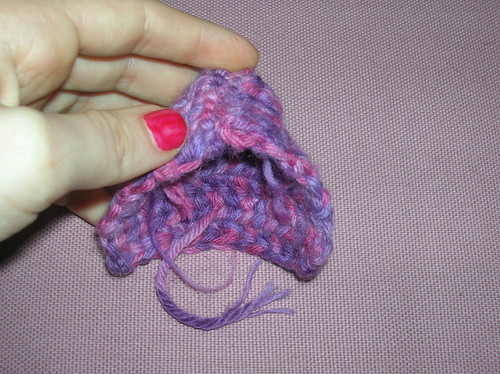
To make the hoodie, fold the rectangle in two, sew one side together and then sew the other side to the neck opening.

Walkman hoodie

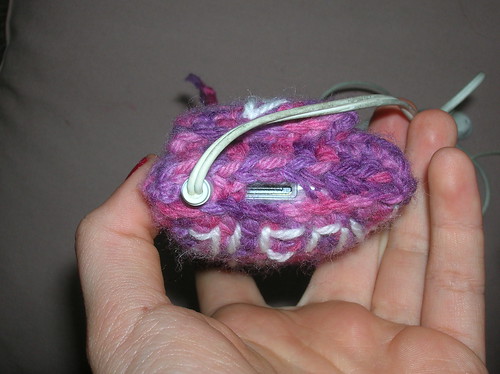
Sew the pocket to the body and then close all the sides of the body leaving some holes for the headphones and the usb cable.

Walkman hoodie

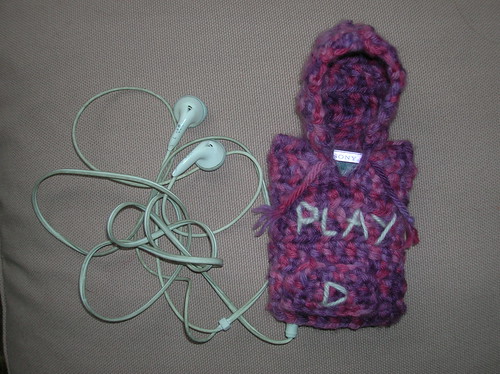
Add the final decorations. I sewed the sentence "let the music play" and a little symbol with white yarn. Then I added two little laces near the hoodie.

Walkman hoodie

Walkman hoodie

If you create something with my patterns, I'd like very much to see it. If you want you could send me the image link via comment, I'd be very glad!

mercoledì 28 aprile 2010

Keychain/ portachiavi

Couple
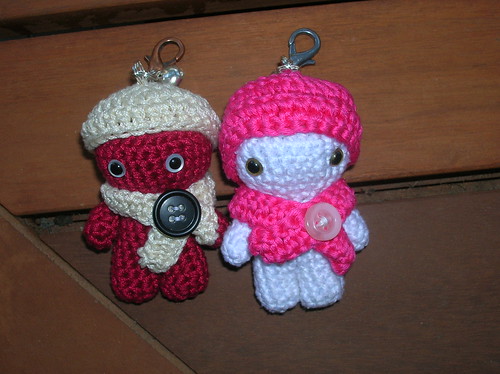
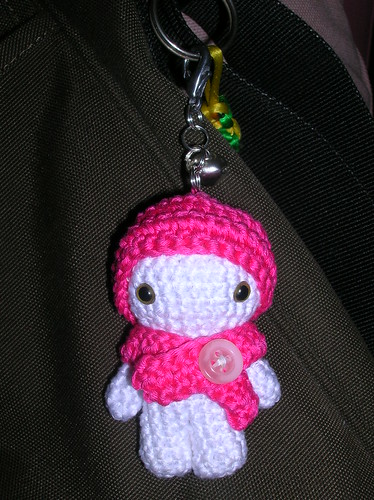
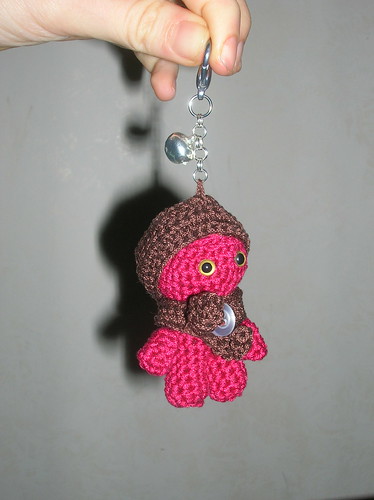
Ho fatto un'altro pupazzetto portachiavi per una signora che me lo aveva chiesto. Quello rosa e bianco è il nuovo arrivato, già ripartito. Il pattern è sempre lo stesso che avevo usato per i suoi fratellini.

I made another keychain for a friend. She liked it very much. The new born is the one white and pink, she's already gone away! The pattern is the same I used for her brothers.

Her

If you create something with my patterns, I'd like very much to see it. If you want you could send me the image link via comment, I'd be very glad!

venerdì 23 aprile 2010

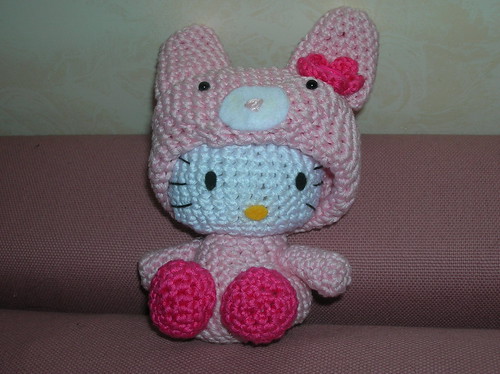
Hello kitty...in a bunny suit/ vestita da coniglietto

Hello kitty in a bunny suit

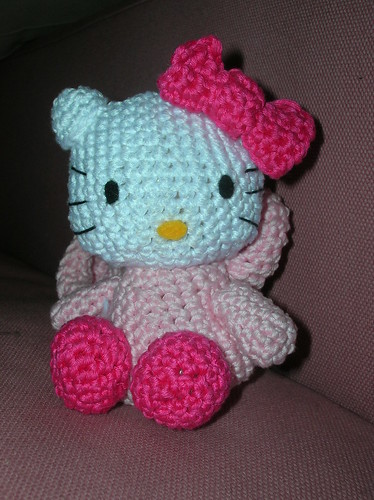
Hello kitty realizzata per il compleanno di mia zia. Ho usato un pattern di un libro giapponese. Se vi serve posso spedire la versione in ingelse o italiano via mail.
Non è dolcissima... io non amo particolarmente il personaggio, però questo amigurumi è veramente carino!

Hello kitty realised for my aunt's birthday. I used a pattern from a japanese book. If you need it I can send you the english or italian version by mail.
Isn't she sweet... I don't like very much the character but this amigurumi is really cute!

Hello kitty in a bunny suit

lunedì 19 aprile 2010

Little alien

Ecco l'ultimo arrivato: un alieno verde e giallo di nome Alì. Ho attaccato braccia e gambe con dei bottoncini, così si possono muovere.

Here's my last ami friend: a green and yellow alien named Alì. I sewed arms and legs whit little buttons so they're movable.

Monster amigurumi

Monster amigurumi

Amugurumi cat ha provato questo pattern! Ecco il suo alieno.

Amugurumi cat tried it! Here's her alien.

Legs (make 2):
1) 8 sc with a MR
2-11) sc in each st around(8)
Finish off.
Head and body:
1) 6 sc in MR
2) 6 inc (12)
3) *1 sc, 1 inc* 6 times (18)
4) *2 sc, 1 inc* 6 times (24)
5) *3 sc, 1 inc* 6 times (30)
6-10) 1 sc in each st around (30)
11) *3 sc, 1 dec* 6 times (24)
12) *2 sc, 1 dec* 6 times (18)
13) *1 sc, 1 dec* 6 times (12)
14) sc in each st around (12)
15)*1 sc, 1 inc* 6 times (18)
16-22) sc in each st around (18)
23) *1 sc, 1 dec* 6 times (12)
24) 6 dec (6)
Finish off.
Arm(make 2):

1) 8 sc in MR
2-9) sc in each st around (6)
Finish off leaving a yarn tail to sew arms to he body

Feeler(make 6):

1) 5 sc in MR
2-5) sc in each st around (6)
Finish off leaving a yarn tail.
Sew three feelers together and then sew this to the body.

Monster amigurumi

If you create something with my patterns, I'd like very much to see it. If you want you could send me the image link via comment, I'd be very glad!

lunedì 12 aprile 2010

Crocheted Top... finished

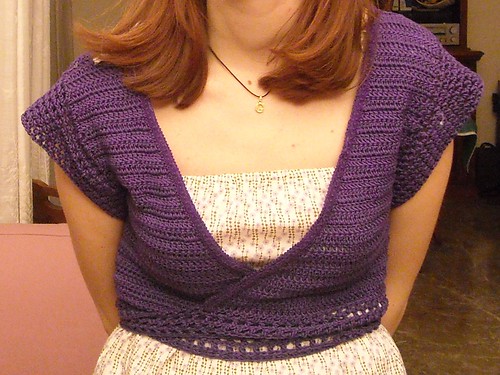
Finito!
È un po' diverso dall'originale. Credo di aver esagerato con la misura quindi legandolo dietro e sovrapponendo un po' i due lembi mi sta meglio. Ho usato cotono ritorto viola scuro e uncinetto 3,5.

It's a bit different from the original. I think I made a size too big for me, so it fits me better if I tie it on the back overlapping the front tiles. I used violet cotton and a 3,5 crochet hook.


Crochet top
Crochet top

mercoledì 24 marzo 2010

Portachiavi/ Them keychains

Them, all togheter

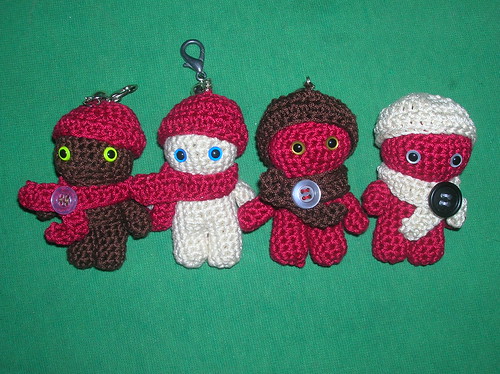
Queste piccole creaturine innominate (le ho chiamate tutte Him, plurale Them) sono molto semplici e veloci da fare e mi mettono molta allegria. Se usate un filato abbastanza fino (io ne ho usato uno adatto per l'uncinetto 2,5) potete montare dei simpatici portachiavi. Fino ad ora ne ho fatti 4, ognuno con delle piccole modifiche rispetto al precedente riguardo la lughezza delle braccia, delle gambe, la dimensione della testa...
Lo schema che posto è quello per l'ultimo Him, che è quello che a me piace di più. Se volete provarli, vi consiglio di fare anche voi piccole modifiche, per trovare il pattern che vi soddisfa maggiormente.

These tiny creatures witouh a name (I called them Him, when they're all togheter Them) are very simple and fast to create; they make me happy! If you use a small yarn (I used a cotton suitable for a 2,5 mm hook) you can create funny keychains.
So far I made 4 Him, each one has little variations from the previous. For example I changed The lenght of arms, body, and legs, the head's size...
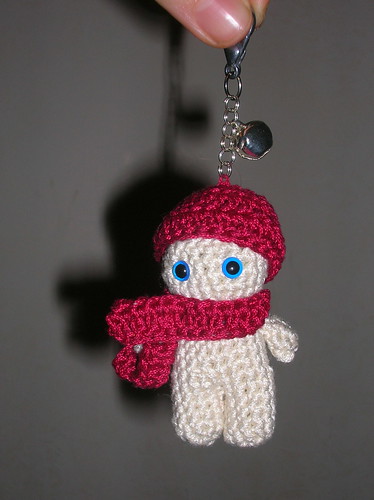
The pattern I'll post is the one for the last Him on the right. If you make one of them, it would be fun you'd do some variations to find your perfect pattern for a Him.

Legs:
1) 5 sc with a MR
2) 2 sc in each st (10)
3-5) sc in each st around (10)
join with slip stitch, finish off leaving a long tail for sewing the legs together.
Make the second leg, don't finish it off. Whip stitch the two legs together using your yarn needle through 4 stitches. Your working loop should be on the outside of the circle and not stitched through. close off the yarn. you should have an eight-like shape of 16 st. Continue working the body.

Body:

1) 7 sc, 1 inc, 7 sc, 1 inc. (18)
2-5) sc in each st around (18)
6) *1 sc, 1 dec* 6 times (12)
7) sc in each st around (12)
8) *1 sc, 1 inc* 6 times (18)
9) *2 sc, 1 inc* 6 times (24)
10) *3 sc, 1 inc* 6 times (30)
11-13) 1 sc in each st around (30) (I inserted eyes between rounds 11 and 12)
14) *3 sc, 1 dec* 6 times (24)
15) *2 sc, 1 dec* 6 times (18)
16) *1 sc, 1 dec* 6 times (12)
17) 6 dec (6)
Finish off.

Arm(make 2):

1) 6 sc in MR
2-4) sc in each st around (6)
Finish off leaving a yarn tail to sew arms to he body

Hat:

1) 6 sc in MR
2) 6 inc (12)
3) *1 sc, 1 inc* 6 times (18)
4) *2 sc, 1 inc* 6 times (24)
5) *3 sc, 1 inc* 6 times (30)
6) 1 sc in each st around (30)
7-8) 1 dc in each st around (30)
Join with sl st, finish off

Scarf:

Chain approximately 35 (it depends on how long you want it)
From second ch from hook dc in each ch. Finish off

Sew the arms, the hat and the scarf to the body

Him

Him

If you create something with my patterns, I'd like very much to see it. If you want you could send me the image link via comment, I'd be very glad!

domenica 21 marzo 2010

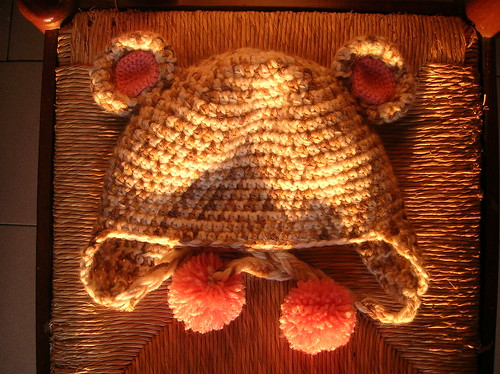
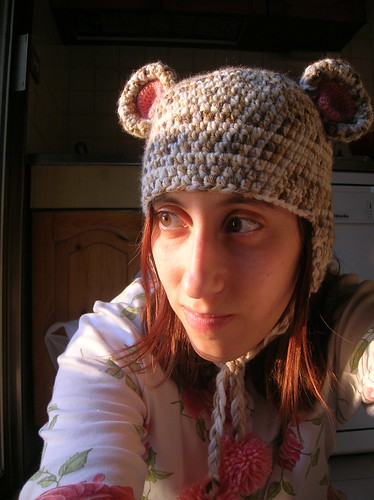
Cappello-orso/ Crochet bear hat

Ho realizzato questo morbidissimo cappellino per il concorso di carnevale del sito Amigurumi word.
Il pattern che avrei dovuto seguire è quello per fare questo Panda Bear hat. Ho fatto un po' di modifiche quindi posto il pattern che ho usato. Per la base io ho usato un filato abbastanza grosso e un'uncinettto 5 mm,se usate un uncinetto più piccolo fate uno o due giri di aumenti in più. Per i pom pom e l'interno delle orecchie ho usato un filato più fine e un uncinetto da 3,5 mm.


I made this soft and warm hat for the Carnival contest of the site Amigurumi word.
I' should have followed this pattern: Panda Bear hat. I made some changes so I'll post my pattern. For the body of the hat I used a thick yarn and a 5 mm hook, if you use a smaller hook you should add 1 or 2 round of increse. for the pom pom e and the inner ears I used a smaller yarn and a 3,5 mm hook.

Crochet Bear hat

BEARY HAT

Body (worked in rounds without joining each round)

Make 4sc in a magic ring

Round 1: 2 hdc in ea st (8 sc)

Round 2: 2 hdc in ea st (16 sc)

Round 3: (hdc in next st, 2 hdc in next st) repeat around (24 Sts)

Round 4: (hdc in next 2 st, 2 hdc in next st) repeat around (32 Sts)

Round 5: (hdc in next 3 st, 2 hdc in next st) repeat around (40 Sts)

Round 6: (hdc in next 4 st, 2 hdc in next st) repeat around (48 Sts)

Round 7: (hdc in next 5 st, 2 hdc in next st) repeat around (56 Sts)

Round 8: (hdc in next 6 st, 2 hdc in next st) repeat around (64 Sts)

Round 9: (hdc in next 31 st, 2 hdc in next st) repeat around (66 Sts)

Round 10-20: hdc in each st.

Don't tie off yarn but continue working the first earflap.

Earflaps

Row 1: ch 1, 11 hdc, turn (12 Sts)

Row 2: ch 1, 12 hdc, turn (12 Sts)

Row 3: ch 1, hdc dec, 8 hdc, hdc dec, turn (10 Sts)


Row 4: ch 1, 10 hdc, turn (12 Sts)

Row 5: ch 1, hdc dec, 6 hdc, hdc dec, turn (8 Sts)

Row 6: ch 1, hdc dec, 4 hdc, hdc dec, turn (6 Sts)

Row 7: ch 1, hdc dec, 2 hdc, hdc dec, turn (2 Sts)

Tie off yarn.

Try out your hat to see where to reattach the yarn to do the second earflap, follow the same pattern you used for the first.


Ears (make 2)

Make 5sc in a magic ring

Round 1: 2 hdc in ea st (10 stc)

Round 2: 2 hdc in ea st (20 stc)

Round 3: (hdc in next st, 2 hdc in next st) repeat around (30 Sts)

Round 4-5: hdc in al st around

Round 5:
(hdc in next st, hdc dec) repeat around (20 Sts)

Round 6:
hdc dec all around (10 Sts)
Tie off.

Inner ear (make two using pink yarn)

Make 6 sc in a magic ring

Round 1: 2 sc in ea st (12 sc)

Round 2: (sc in next st, 2 scc in next st) repeat around (18 Sts)

Round 3: (sc in next 2 st, 2 sc in next st) repeat around (24 Sts)

Round 4(sc in next 3 st, 2 sc in next st) repeat around (30 Sts)
Tie off.

Assemble the two part of the ears and sew them to the body.

Tassels (make 2)
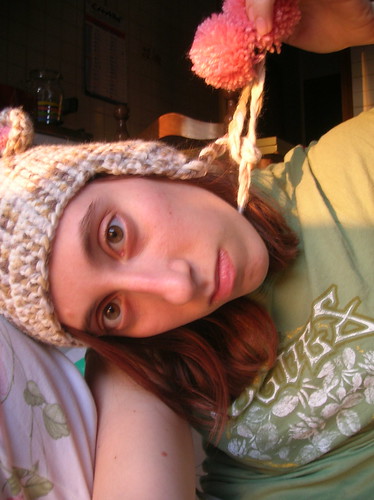
Make a pom pom with pink yarn and tie it with 3 long thread of brown yarn folded in two. Now you should have a pom pom tied to 6 yarn. Make a tessel and tie it to the earflaps.

Panda bear hat

Crochet Bear hat


If you create something with my patterns, I'd like very much to see it. If you want you could send me the image link via comment, I'd be very glad!

mercoledì 17 marzo 2010

Agnellino/ Lamb

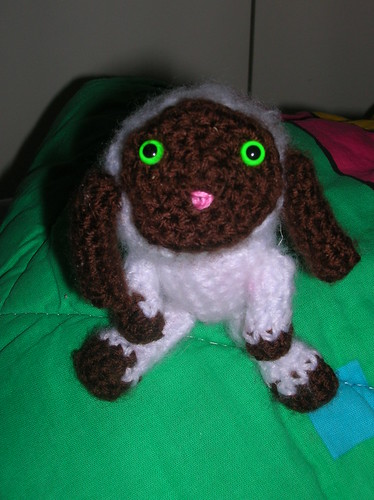
Questo agnellino si chiama Pasqualino e l'ho fatto seguendo questo pattern.

This lamb is Pasqualino; I made it following this pattern.

Lamb amigurumi

giovedì 11 marzo 2010

ciocco & panna

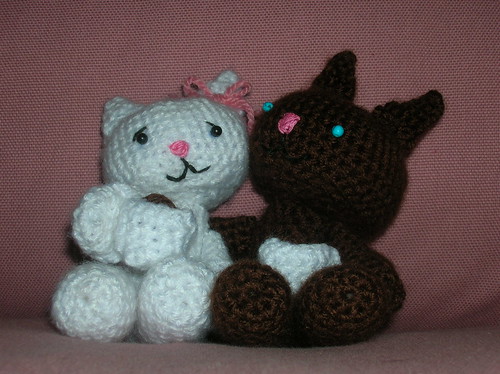
Questi due gattini li ho realizzati per un contest organizzato da
http://amigurumiworld.forumcommunity.net/ per San Valentino. Sono fatti seguendo questo pattern ma apportando alcune modifiche per fare i gattini invece dell'orso. Per fare la coda ho avviato un magic ring di 7 sc e poi ho continuato a fare sc finché non era della lunghezza desiderata. In mano tengono due tazze di cioccolata calda.

This Kittens were made for the contest organized by http://amigurumiworld.forumcommunity.net/ for S. Valentine day. I made them following this pattern with some changes to make the cats instead of the bear. For the tail I made a magic ring of 7 sc and then I went on doing sc until the tail was long enough. They're holding two hot chocolate cups.

Le orecchie sono fatte così:
This is the pattern for the ears:

1-magic ring 4sc
2-sc, inc ,sc ,inc (6sc)
3-2sc, inc, 2sc, inc (8sc)
4-3sc, inc, 3sc, inc (10sc)
Finish off

ciocco&panna

ciocco&panna

lunedì 8 marzo 2010

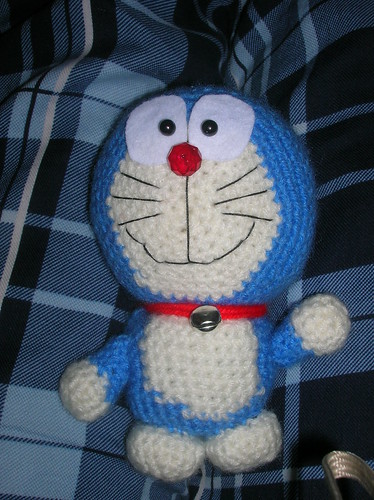
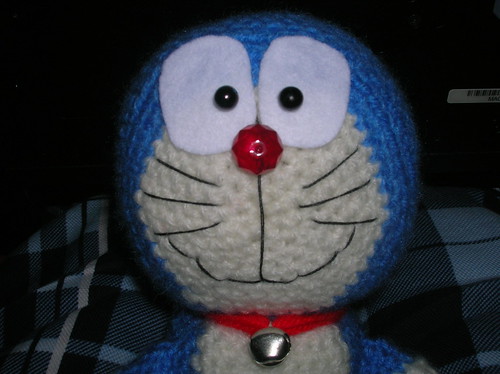
Doraemon

Doraemon il Gatto spaziale!

Doraemon the robotic cat!

If you need the english pattern e-mail me, Ican't post it here.

Pattern here

Doraemon amigurumi

Doraemon amigurumi

giovedì 4 marzo 2010

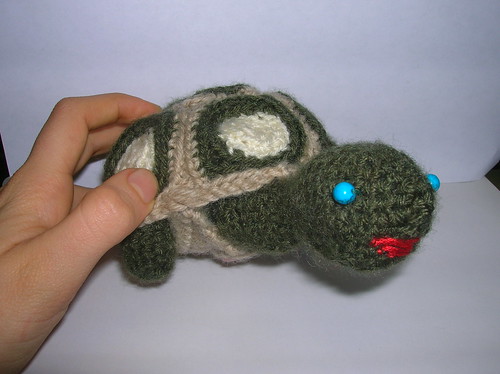
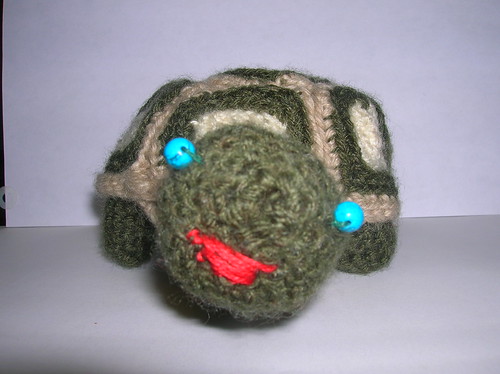
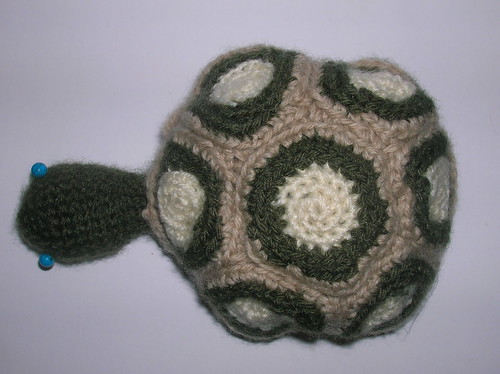
Turtle toy

Una bellissima e simpaticissima tartaruga di nome Ugo, fatta seguendo questo pattern.
La cosa che mi piace di più è che il gilet che forma il guscio si può togliere lasciandola nuda :). Anche se nel sito dice che il pattern è facile, secondo me è abbastanza difficile: in totale è composto 16 pezzi (9 di guscio + 7 di corpo) e ci sono molti cambi di colore nelle placche del guscio.

Here's Ugo, a beautiful and funny turtle made following this pattern.
I like very much the fact that his gilet can be taken off leaving him naked :).
In the site the pattern is considered easy but I don't agree, actually I think it's quite difficult: it's made of 16 pieces (9 for the shell + 7 for the body) and there are many changing of colours for the shell tiles
amigurumi turtle

amigurumi turtle

amigurumi turtle

lunedì 15 febbraio 2010

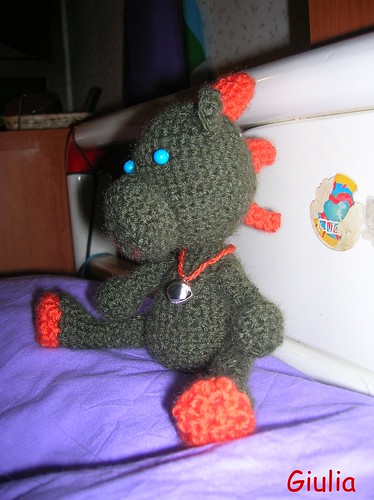
Draghetto/ Dante baby dragon

Questo dolcissimo draghetto l'ho fatto seguendo questo pattern.

Per il corpo ho usato acrilico verde scuro e per i particolari acrilico arancione. Gli occhi sono fatti con due perline attaccate con la colla. Al collo è legato un campanellino. Il pattern non è complicatissimo ma ci sono alcuni passaggi un po' difficili.


I made this cute dragon following this pattern.

I used green and orange acrylic yarn. The eyes are made from two beads fixed with some glue.Thjere's a little bell dangling from his necklace. The pattern is not so difficult.

draghetto amigurumi 2

domenica 14 febbraio 2010

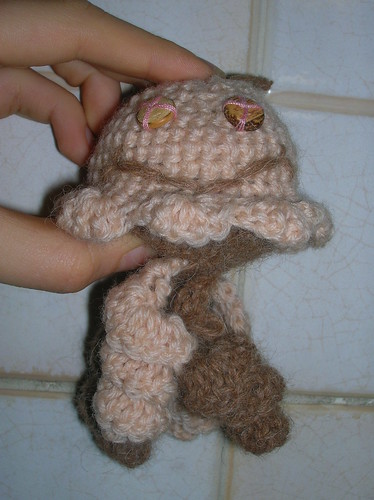
Medusa amigurumi/ Amigurumi jellyfish

Il mio primo amigurumi è stato una pallina riempita con la carta igienica ridotta in coriandoli. Purtroppo il mio gatto l'ha scovata e ci ha giocato fino a disintegrarla. La delusione è stata tanta che ho deciso di non riprovare più a fare palline ma cominciare con qualcosa di diverso.
Ecco il primo pupazzetto completato: una medusa.
Il pattern l'ho trovato qua
Ho usato lana misto acrilico rosa per il corpo e marrone per la chiusura sottostante. Ho fatto quattro tentacoli, due per ogni colore; gli occhi sono due bottoni di legno cuciti e la bocca è in lana marrone. Il pattern non è complicato, quindi lo consiglio anche a principianti.

amigurumi jellyfish